So, if you read my little sojourn into the delicious architecture that is Kubernetes (K8S) you’d have read a little bit on Operators. This part of the knative blog will talk about how to install, and test, the OpenShift Serverless operator which adds the knative functionality to the Cluster.
I’ll be working with an OpenShift 4.6 cluster here, so the screenshots will reflect that; this post will be a little of a ‘do this, do that’ kind of nag but stick with it; I’ll explain what I’m doing at each point (and any gotchas which I seem particularly good at finding; basically I break everything I touch, sometimes even intentionally).
What am I trying to do? Set Stuff Up…..
So, OpenShift supports a serverless approach as documented in the first of these posts, but when you install OpenShift it doesn’t pack your cluster full of stuff you might not want. Using the Operator approach, again something I went into briefly in the last interlude blog post, we can add the bits we need to the cluster.
By installing an Operator what OpenShift does is to download and run the Operator itself as an application (amusingly using another operator, the Operator Lifecycle Manager operator, which does for operators what operators do for the applications they control and monitor. Now trying saying that sentence four times without falling over).
And now to do it…
OpenShift is nice in that the UI for adding Operators from the operatorhub.io (a community site where organisations can commit their own Operators for use by others) provides all the complexity in a simple to use interface.
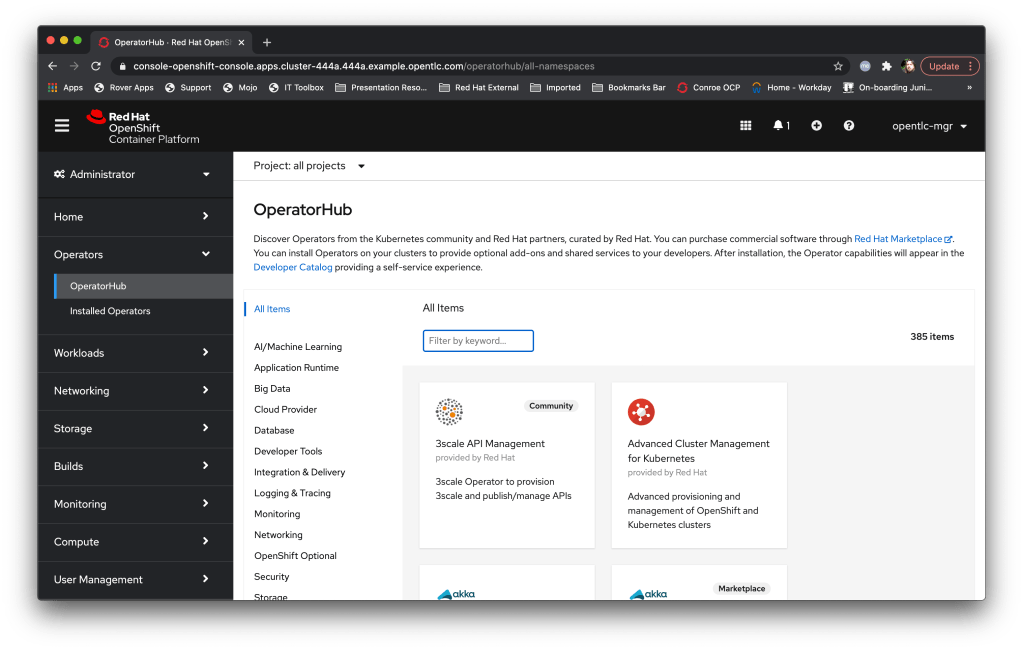
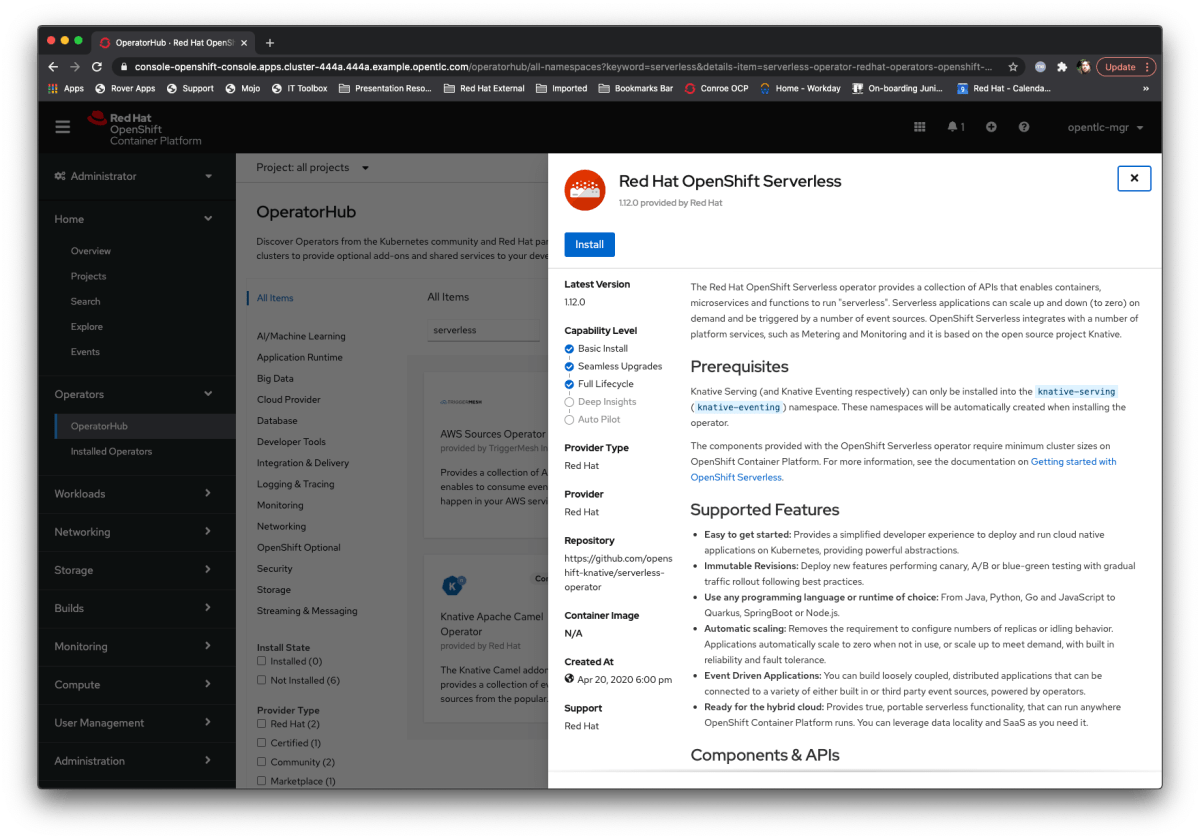
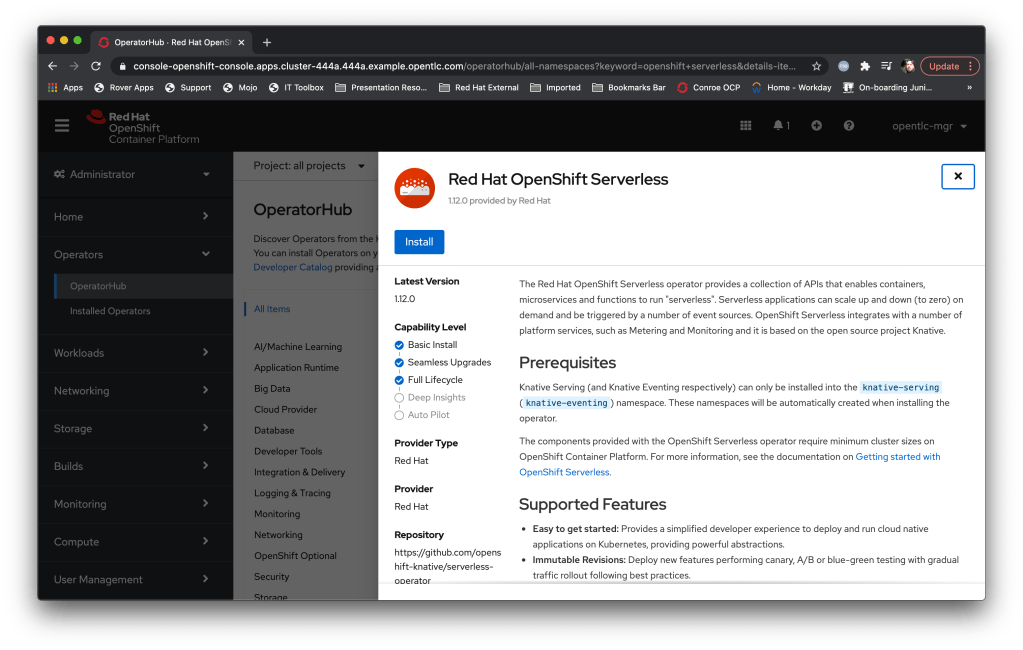
What I do first is to search for the Serverless operator:

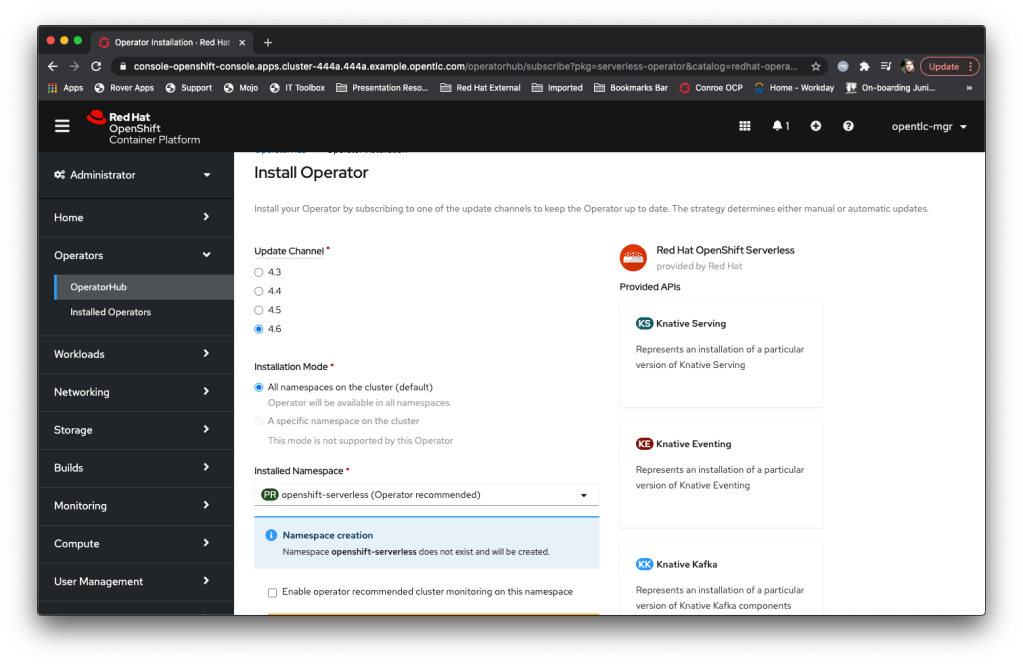
Then I pick it and install it with all the defaults:
So what is it doing? Well, as you can see from the picture below, the Operator creates a namespace (openshift-serverless) and downloads and runs the Operator. What it doesn’t do is……..actually install the serverless technology.
Once you hit install you get a dynamic page that tells you the progress of the installation; this in and of itself is pretty cool, in the old days (i.e. previous versions) it didn’t really tell you what was going on which was a bit hit and miss). Once the Operator is installed you can click on the helpful ‘View Operator’ button and actually get the serverless serving stuff going.
The Operator view gives you a number of context specific menus and the ability to kick off the APIs supported by the Operator. We’re going to play with the Knative Serving stuff, so I click on that one (create instance) and hit the first gotcha – the knative serving engine *must* be deployed in the knative-serving namespace. Interestingly the Operator creates that namespace, but when you go to the API screen the UI is still actually in the openshift-serverless namespace, so you need to remember to change the namespace, at the pulldown at the top-left of the ‘Create Knative Serving’ dialog, to knative-serving before clicking on Create (you will have to choose the OpenShift Serverless operator in the namespace and choose to setup the Knative Serving component.
Fast forward to when it says it has finished and, wahey, we can start to play with it.
One of the other nice things about the Operator framework in OpenShift is the UI itself is dynamic depending on the Operators you have got installed – now we have the serverless operator running we are given the option, when we create an application, to instantiate it as a knative service rather than a deployment (or an OpenShift deployment config).
So, in order to test it is all going fine I’m going to create an application; I have a couple of test apps I use that provide RESTful and http endpoints, and I’m going to use ‘ocpnode’, a quick-to-compile application from my github repo.
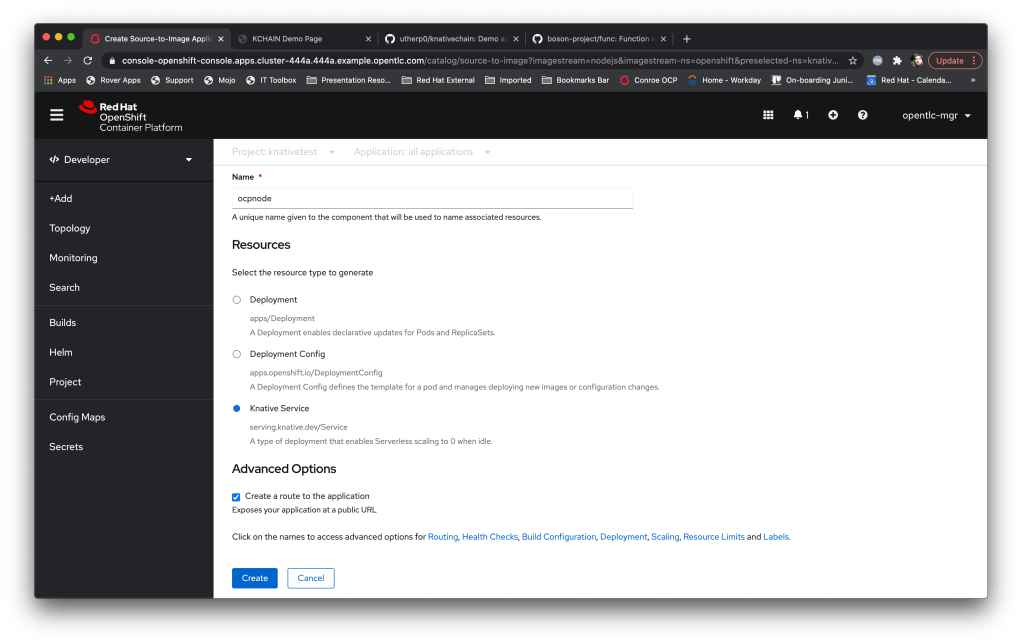
Here’s where the dynamic nature of the UI shows itself; when I create the application via the developer viewpoint, by choosing ‘Add+’, ‘From Catalog’ and the node.js builder image (more about that in the next interlude post) I now have the ability to choose to make the application a knative service:
Now, while the image is building the knative service is unresponsive; clicking on the route to go to the application will return the ‘Application is not running’ page from OpenShift. This is down to the way that K8S actually works; as I mentioned in the interlude blog you ask nicely for K8S to change the state of something and then it will do it asynchronously. In this case the image is not in the registry as it is being built, so the ingress traffic has nowhere to land.
When the build completes the knative service effectively ‘dry runs’; the system simulates ingress traffic and the Pod is started. Once the timeout for inactivity passes the operator automatically down-scales the Pod to 0, but it is ready for requests.
I like the way OpenShift renders the knative service in the topology view; you can instantly see the state of the Pod and the traffic weighting.
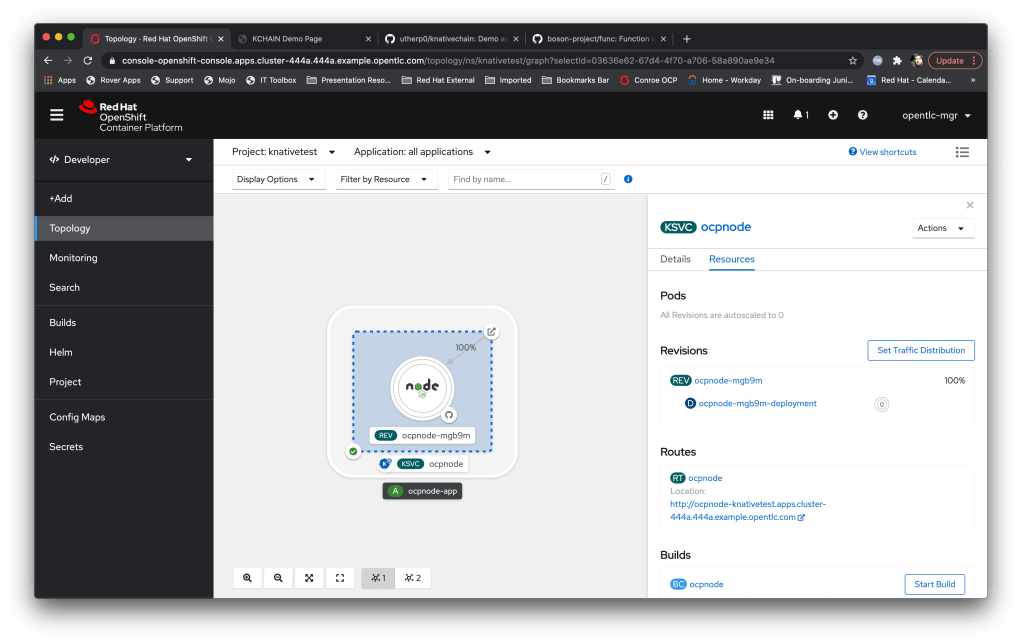
Now, about the traffic weighting; OpenShift serverless supports the concept of revisions. These are different versions of the same service that are served from the single service ingress point; in English you have one FQDN (fully-qualified domain name) and OpenShift will intelligently route the traffic to multiple different copies of the application based on a traffic weighting.
A revision is actually one of a number of things; simply changing the configuration of the deployment (i.e. the bits around the image as opposed to a different version of the image) will create a revision (good example, you have an app that is driven by an ENV, say ‘MODE=debug’ and ‘MODE=production’. Changing this ENV variable as part of the K8S deployment for the service will create a new revision), as will rebuilding the image itself.
One of the nice features of knative is the command-line, kn. This is a kube-config controlled command (kube-config basically reflects the logged in state on your machine; doing a login to K8S via kubectl or oc sets this state, kn uses the state).
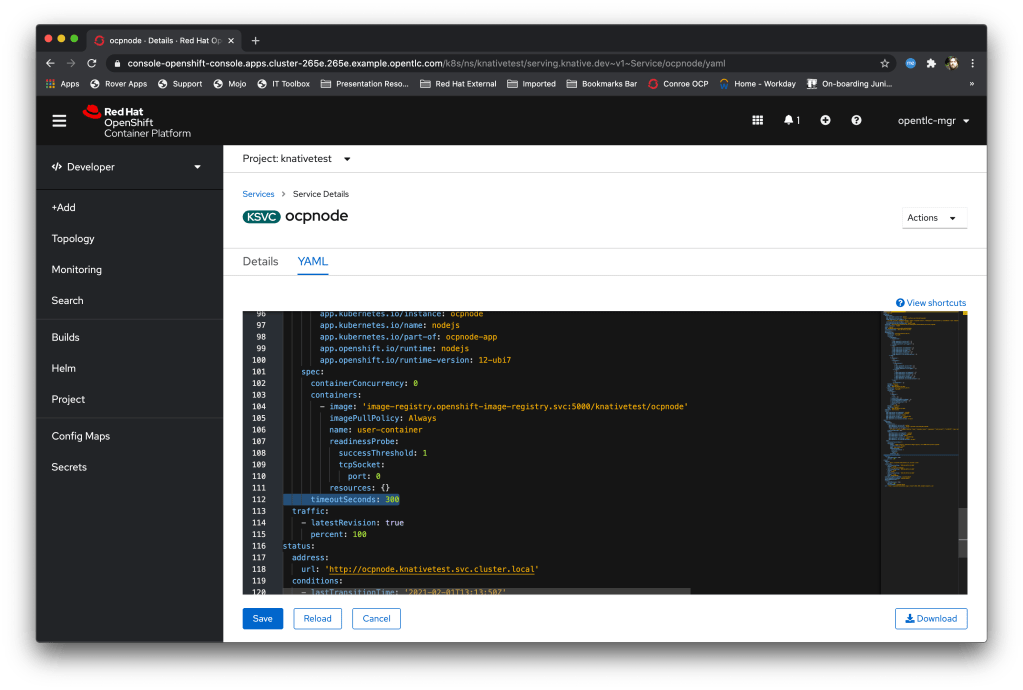
If I now click on the route icon at the top of the Knative box on the UI it will pop up a tab and call the route – this pushes traffic into the knative service handler and et voila, the Pod will spin up (if it has spun down while I’ve been typing) and serve the page. After a while, defined in the container spec for the knative service, as highlighted below, the Pod will scale down. Nice…
Right, next blog post I’ll show you the cool virtual ‘loom’ demo you can run yourself to see this concept in action with four services, each with three revisions, and a randomised front-page that calls them periodically to build a pattern….
