Categories
Uncategorized

My first Neuron! Atomic AI principles/fun

Something a little different; apologies for the quietness, been posting on the other blog site (rhuki.dev) and forgot about my own little corner of delightfulness on the World Wide Web. This post is going to be a little different as I’ve, gasp, been having some fun with AI concepts in the last couple of weeks and thought I’d share some of the work in progress.

I’m doing a talk/keynote at the AI Summit in London, in June, and wanted to have something different to demo. I’ve been working with ODH (Open Data Hub) and Spark with some customers, but wanted something a little more down-to-earth but exciting, something nobody has done before.

So I decided to see how easy it would be to model the smallest atomic components of Artificial Intelligence.

I’ve always been really interested in the *simple* bits of AI; the complexity of AI/ML solutions is always built on actually simple components, as is the human brain. All of the stuff that goes on up there is down to aggregation of billions of tiny little threshold machines – the Neurons.

I’ll take a step back; when looking at AI solutions I tend to up going one of three ways for the basic foundations – either a generational Cellular Automata model, a fluid Cellular Automata model or a Neuron based approach. In English:

With a Cellular Automata you represent the experiment/problem space with a set of autonomous objects, the cells, which can interact with each other, have behaviours based on, say, a genetic model (where new cells are created by the combination of previous cells with alterations by mutation or other Genetic algorithms). Cellular Automata are brilliant for representing and simulating population based experiments.

A Generational CA works by using a current generation of cells and calculating the next generation from the state of the current generation, then discarding the current generation. Results are often then obtained by the statistical analysis of temporal behaviours; how certain types of cell expand in number, shrink in number, change. Analysis of the start state, end state and relative populations can give some cool insights into the nature and effect of genetic modification.

A Fluid CA works slightly differently in that the transition from generation to generation isn’t done as a step; the population is randomly sampled and adjusted without considering the whole population state (in English, rather than start with a ‘current population’, process all to get the ‘next generation’ and discard the current one, you randomly select population members and apply changes there; this approach has a smaller footprint as you maintain only a single population, and because you remove the sharp step of a population->population model it can smooth out changes and produce a more natural change of state).

But onto Neurons….

I’ve alway been intrigued by the concept of the Neuron; basically an aggregation point for multiple inputs that generates a pulse, or an output, when the combination of the inputs exceeds a threshold. Yeah, that was dumbing it down to the level I understand it, but the idea of having a small processing unit that is driven, by event, and can generate an event based on the analysis of the inputs, provides a great way to build complex learning systems, especially when you can set the nature of the inputs, the behaviour of the Neuron (which can evolve) and the outputs.

In previous systems I’ve kept the Neurons simple; fire off this event if you’ve seen *all* of the input events (not at the same time), fire off an event if you have seen *all* the events at once, fire off an event of type A if you see event C and D, or an event of type B if you see event E and F, the combinations are infinite.

It gets even cooler when you start to introduce feedback loops; Neurons that fire events that end up contributing to the events that are sent to them. You can build some very complex behaviours into this kind of system. And then you can start to express the behaviour (the events in, the holistics, the events out) as strings which can then be treated as genes; throw in some periodic mutation via a genetic algorithm and you can simulate some very interesting things.

But how does this relate to development? Well, the issue with this kind of system is that in order to simulate anything of import you need a lot of Neurons; having a small number makes the results coarse, no matter how you tune and train them (think of it as trying to represent an alphabet with ten characters, there’s a lot of difference between each character and this forces a solution to collapse to a determined end ‘harder’, as in more black and white).

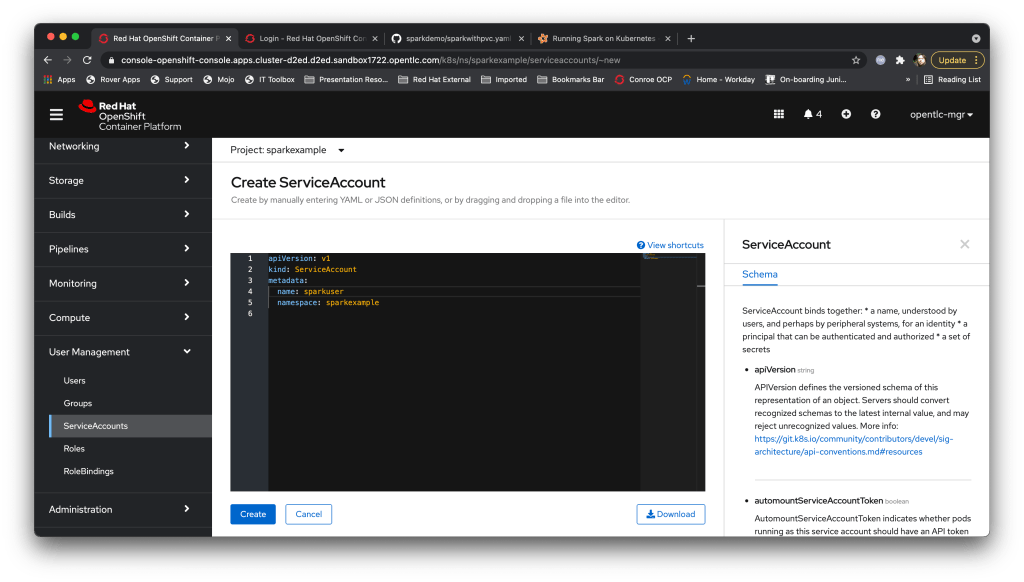
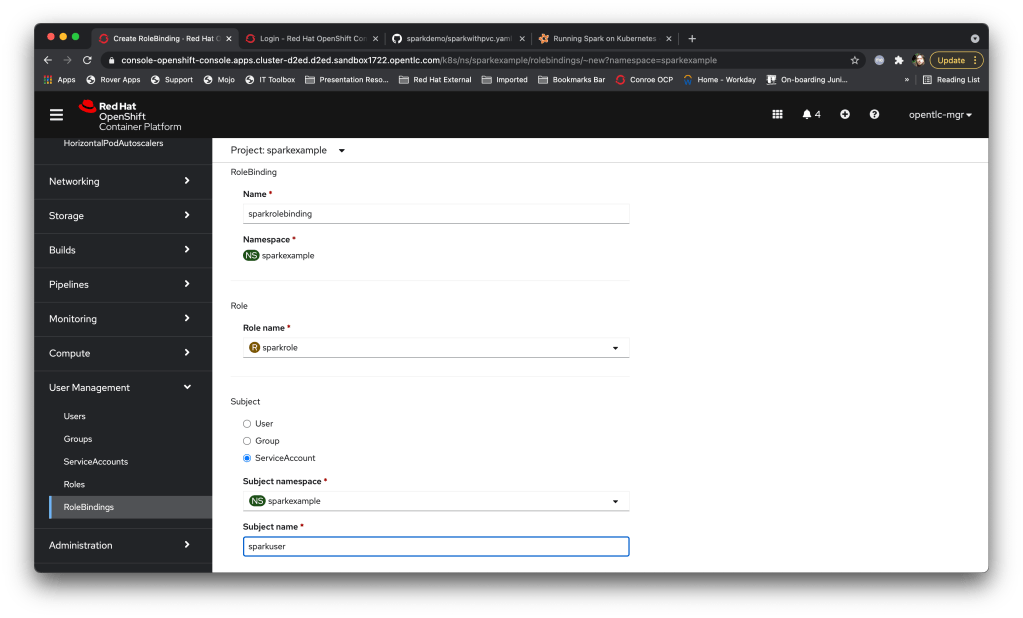
So, as a thought experiment and for demos, I’ve decided to use some of the cutting edge technologies in Kubernetes/OpenShift to build a Neural ‘play pen’ which should get around the limited compute restrictions most people have when building this kind of system.

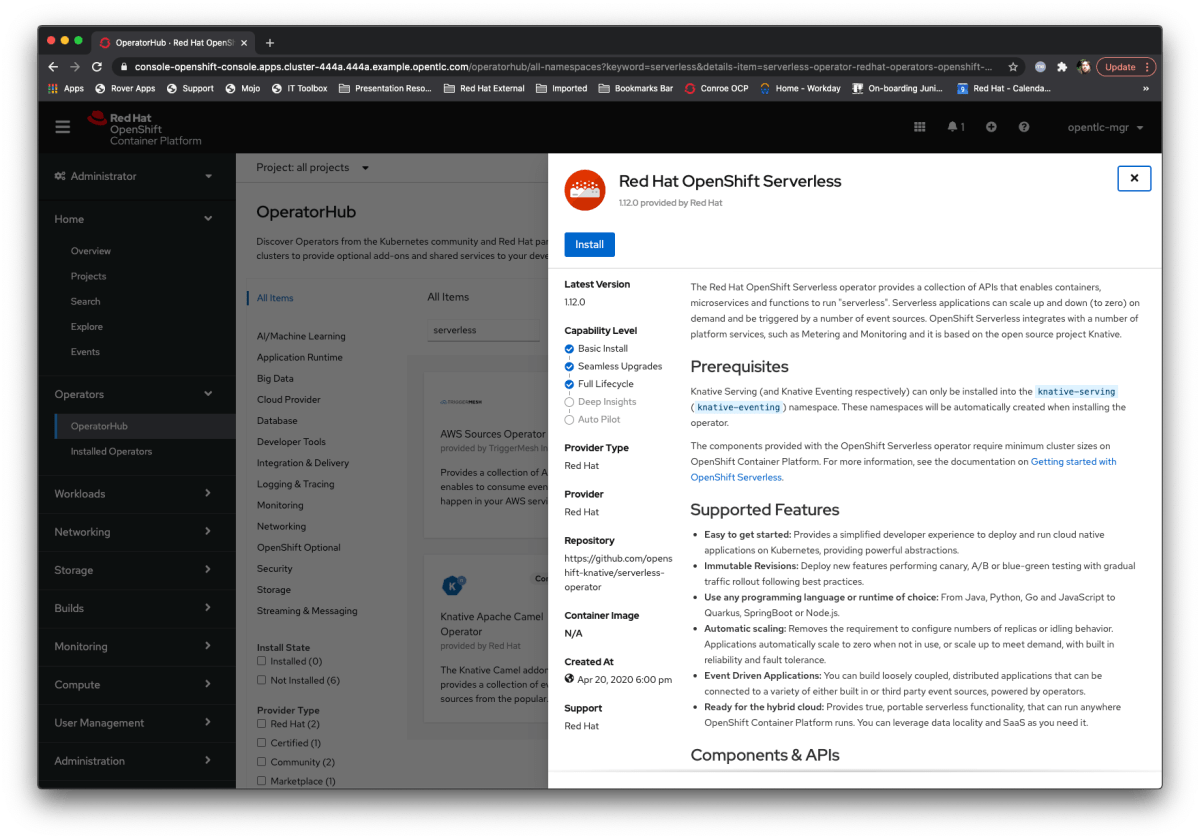
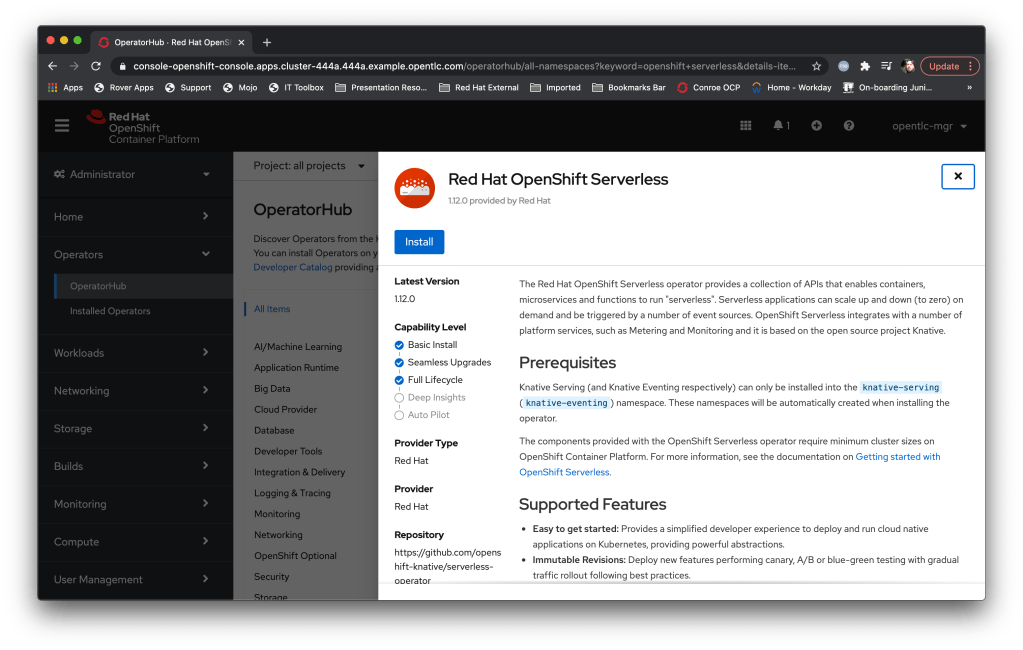
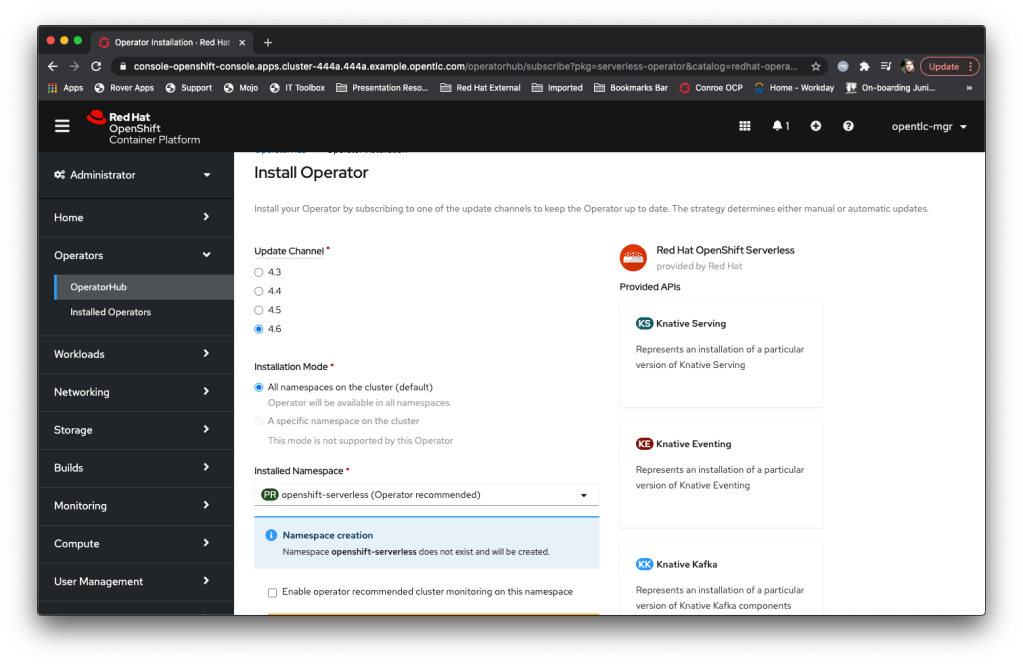
And the key component of this is the Knative serverless technology; I’ve talked about this a lot but at its simplest it’s a technology that effectively executes containers *only* when they are needed rather than standing up a Container that is waiting for traffic or an event 24/7.

My high level design is reasonably simple:

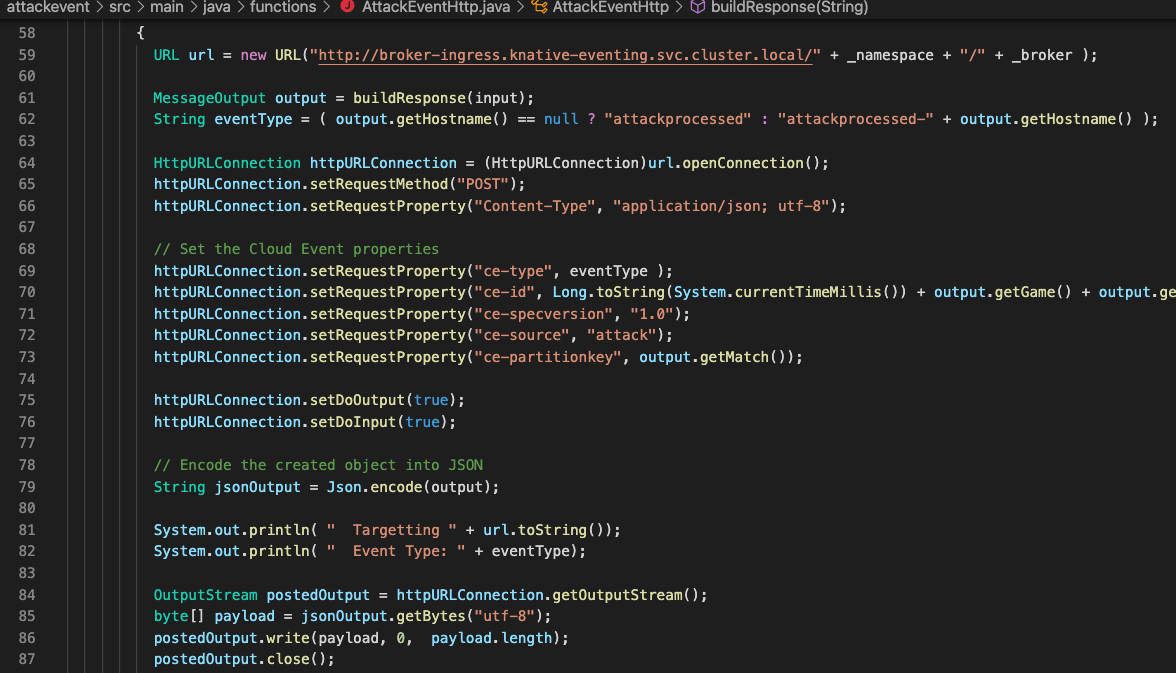
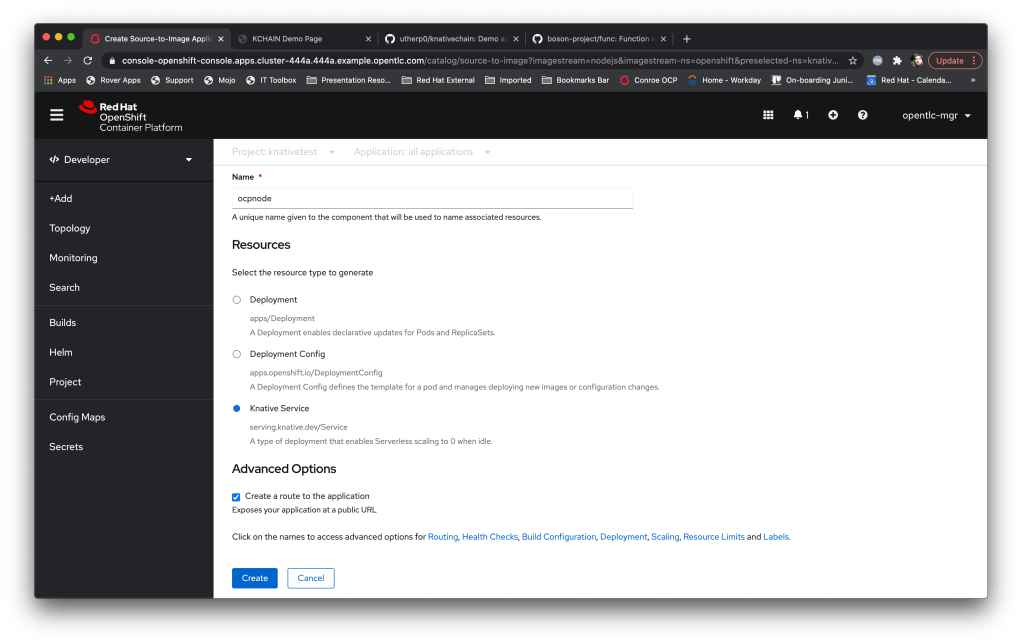
Neurons/Processors made up of knative-event driven small containers; these are created by and consume cloud events (I did a blog post a while back on those) and, as a simulation of output, throw new cloud events based on the aggregation and processing of the events they receive. Interestingly these are stateless which doesn’t make a huge amount of sense until I talk about….

Data Grid/Infinispan which is an in-memory datagrid for name/value, NoSQL data. This acts as the memory of the system; the Neurons are started by the receipt of a named cloud event, they connect to the grid and are given the data relevant to their unique instance. They then process the data and the event accordingly, push the data to the data grid, and then are timed out and decommissioned by the OpenShift cluster. The Data Grid provides the long term memory, the knative events provides the processors.

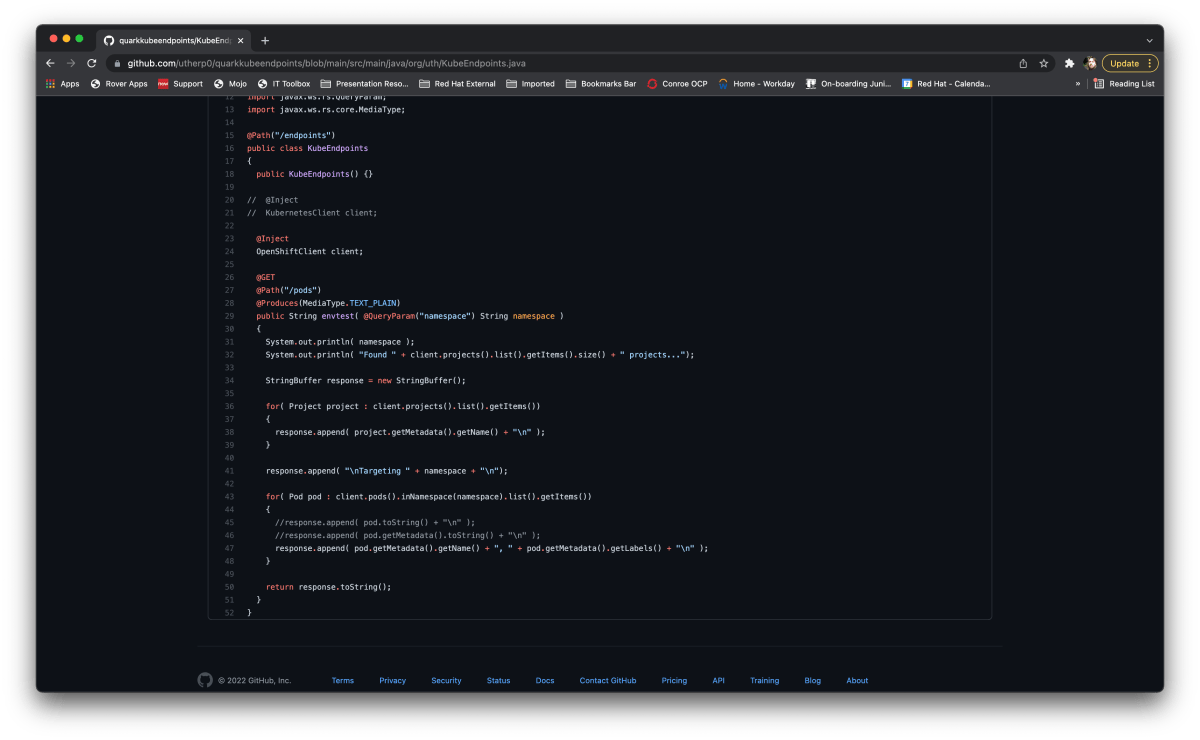
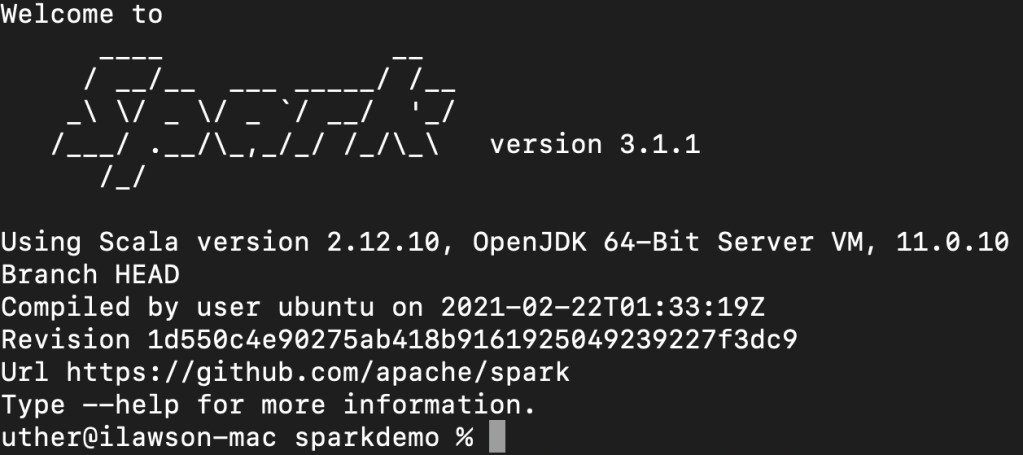
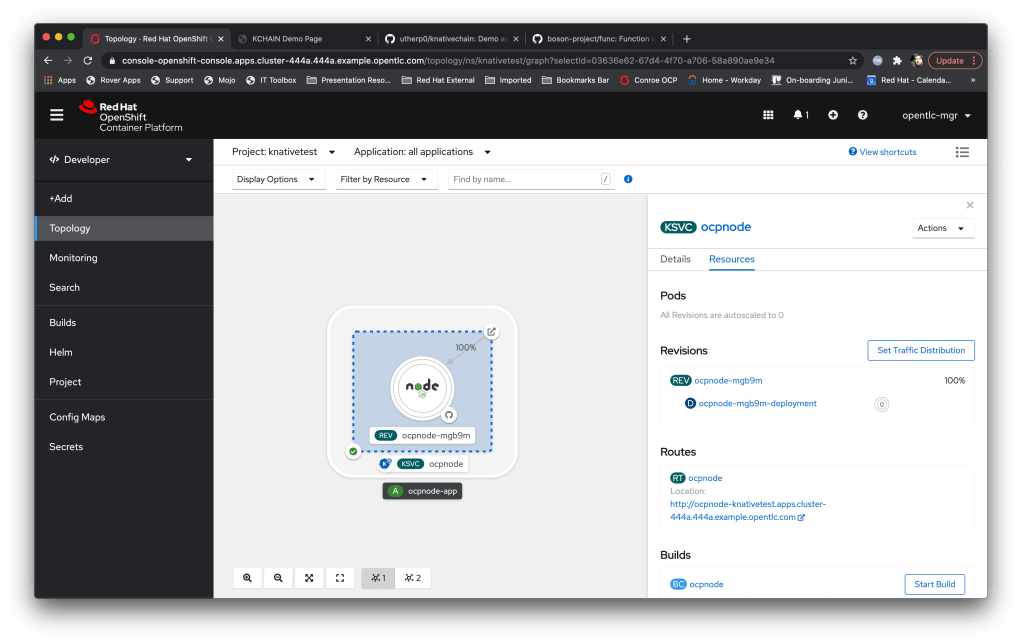
This is efficient because, in theory, I can have a huge number of inactive services. It highlights the power of Knative in that the Neurons only exist and consume resource for the duration of their processing. Also, I’m developing the initial Neurons in JAVA and compiling with Quarkus; this will allow me to build the Neurons using the Quarkus ‘native’ mode which makes for very fast startup containers, plus I love JAVA of course.

It’s early days but will provide a cool demo and allow me to do some research into the behaviour of Neural Nets using non-resident compute components, which should be very interesting.

The code for the work-in-progress stuff is available at https://github.com/utherp0/kneural – I’m calling it Kneural to keep with the Kubernetes style naming conventions.

Categories
Uncategorized

What on earth is KCP and why should I be very, very excited about it?

When people ask me what I do for a living I give up trying to explain what it is and just say ‘software’, at which point their eyes glaze over and the conversation shifts to weather, which politician has done what insanely hypocritical thing and whose round it is.

And the reason I find it hard to elucidate what I do for a living is that it’s hard to explain just what a tech-mad solution architect does; I stay at just-behind the cutting edge of open source software, one foot in the camp of supported versions (the Red Hat model) and the other constantly dipping my toes into the ‘new stuff’ that is coming.

When Docker first came out my thoughts were, in chronological order, ‘I don’t understand this’, ‘that’s a nice little idea’, ‘that’s a stunning idea’, that’s the future’ in that order (although ‘I don’t understand this’ did pop up a lot more).

And then Kubernetes came on the scene. And with a good deal of clever forethought, Red Hat and the Open Source communities dropped their ‘super-controllers’ around Docker and other segmentation/containerisation technologies, and jumped wholeheartedly on the Kubernetes bandwagon (or should that be sailing ship, keeping true to the Greek taxonomy for the project).

If you’ve read any other of the posts you know my day-to-day job revolves around knowing OpenShift inside and out, from a perspective of why it is Enterprise strength etc etc. And part of that role has led me to get an understanding of what Kubernetes actually is.

I’ve blogged on the fundamentals of Kubernetes before, but I’m going to reiterate my simple explanation because it is completely relevant to what I want to enthuse about in the post, namely a little prototype called KCP that does something……..brilliant.

So, Kubernetes is a Container Orchestration system. And that is the worst description I will ever type around Kubernetes; saying that is like saying a Ferrari is four tyres and a chunk of metal. It describes it perfectly while missing the point; you don’t buy a Ferrari for four tyres and a chunk of metal. You buy a Ferrari (if you’re not a software engineer/solution architect and can actually afford one) because of it’s elegance, it’s sophistication, and the crafting and engineering that make it much more than four tyres and a chunk of metal.

So, Kubernetes is, at its heart, a reconciliation based state machine. In actuality it’s two systems; one is a ‘virtual’ system, comprising the creation and manipulation of ‘objects’, and one is a physical one, where the representations of the virtual objects are instantiated and kept compliant by ‘drones’ driven by changes in the object model.

In English; when you interact with a Kubernetes system you challenge it to keep a set of required states. Kubernetes balances the physical instantiation of the Objects with the required state of the Objects held centrally.

At its heart that is it; the map of Object model to state is kept centrally (in etcd) and manipulated via a control plane, where the Objects have their own dedicated controllers whose job is to task physical instantiators (the kubelets that live on the Worker nodes) to realise and keep compliant the required state.

If the physical instantiations change, i.e the Pod fails, then the controller, in tandem with the Kubelet, will try and restore the required state. The lovely thing about this is the disconnect; the control plane owns the intended Object state, the Kubelets resolve and report.

I have digressed but I hope you get the point; Kubernetes is a brain and a set of physical points that are disconnectedly ‘fire and forget for now’ updated, then respond with state changes to the brain which decides if the state has been resolved or not.

The thing is this; it’s brilliant and it is 100% linked to Containers/Pods. The Kubelets just handle the orchestration and health of Pods on their node. And this is where KCP comes in.

So KCP is effectively the brain unhindered by the physicality of Kubernetes. And that’s a great think; it’s the control plane with all its brilliant ability to reconcile and maintain Object state, but it is not limited to the physicality of orchestrating Pods.

And this is completely my take from my understanding of the Kubernetes mechanisms and what I’ve seen from the KCP project.

Why is this brilliant? Because it means you can use that disconnected two step reconciliation approach for anything you can write an end controller for.

To me the goal of KCP is to provide that for any type of system that can be reached; imagine a pseudo-kubelet that provides orchestration over, say, a set of autonomous robots. You will be able to use KCP to control, reconcile and ensure compliance of the end state of the robots.

This disconnection of the ‘brain’ side from the physical realisation side means the sky is literally the limit in terms of what you could eventually control with a KCP. Anything that requires a defined state and a compliance can be architected to behave like a Kubelet, and then controlled by KCP.

I really like that idea – the KCP project is very young and is currently just a prototype and a (comprehensive) list of targets, but my gut says it will be a very interesting thing to follow.

The current git repo for the project is at https://github.com/kcp-dev/kcp and the goals/roadmap is at https://github.com/kcp-dev/kcp/blob/main/GOALS.md – have a read and see what you think…

Categories
Uncategorized

Quarkus and Kube, a match made in heaven….

I love OpenShift. There, said it. It appeals to my inner geek, the combination of sleek UI and the ability to just create stuff, as opposed to fumbling around for dev kit and all that infrastructure ‘fun’. I like the nature of Kubernetes; I preach about the object model over-enthusiastically to any customer/techie that will listen, but I’ve always had a problem working programmatically with it.

What I mean by that is the interactions I have had with OCP and K8S have always been via the command line (oc or kubectl) or the UI; I was a developer for a long, long time and my weapon of choice is JAVA. There’s very little I can’t do once you give me a JVM and an editor, but I’ve never been able to link the two worlds together comfortably.

I found a great blog (courtesy of LinkedIn of all places) by a fellow Red Hatter who had modernised (yeah, it’s brand newish technology but every-changing) a previous example of talking directly to an OpenShift cluster via the Fabric8 API. I found it intriguing because not only did I show connectivity (via the Kubernetes client) but also the basic mechanics of writing a Custom Controller/Operator.

This blog is available at https://blog.marcnuri.com/fabric8-kubernetes-java-client-and-quarkus-and-graalvm and I highly recommend giving it a read. It inspired me to revisit my previous attempt (stale for two years) and recreate it in Quarkus; my intention was to finally get a programmatic handle into OpenShift.

In this blog I’ll walk you through setting it up and then you can play with it; my intentions was to give myself a foundational example that offered a RESTful interface to some visibility of the target cluster. I built the application using Intellij IDEA2 which gave me some headaches (hint – if you change a pom.xml file remember to press the little ‘update dependencies’ button that appears, almost hidden, next to the multitude of syntax errors that appear).

The code for this example is freely available at https://github.com/utherp0/quarkkubeendpoints

So, to start I went to the Quarkus site and used the fantastic feature they have to scaffold some code; I chose the RESTEasy framework and added the ‘OpenShift Client’. This is really cool; it adds the components to the POM file you need for using the Fabric8 OpenShift client API but also adds the ability, via the @inject annotation, to directly inject an existing authorised client.

Changing the name and package, of course….

In English what it does is lift the auth token stored in the kube.config and uses that directly; it does mean, for the app to function, you must have pre-logged on to an OpenShift cluster. My next additions will be to add the ability to pass authentication information in and then construct an object of type OpenShiftClient.

The example uses the standard Quarkus approach of building via Maven; I had to coax some changes to get it to behave the way I wanted. The first was I added this to the applications.properties (Quarkus is great in that all of the -Dx=y params can be predefined, and conveniently forgotten about, in the applications.properties file.

quarkus.kubernetes-client.trust-certs=true
quarkus.package.type=uber-jar

The top line is me being lazy; all comms to the OCP cluster are via https and having had a nightmare earlier in my career trying to setup .jks (‘jokes’ comes close) cert store stuff in JAVA I now just take the insecure approach; not good for production of course, but fine for prototyping.

The second is again for simplicity for me. I like a fat JAR with all the required dependencies in there. Normally I have to faff around with the build component of the pom file but Quarkus already has the components, you just need to set that package type and it generates a standalone runnable ‘runner’ JAR.

I also messed up the pom a bit, so had to craft the dependencies myself; to use the RESTeasy and OpenShift stuff I added the following. I also added the Kubernetes Client but I’ll discuss that in a moment.

    <dependency>
      <groupId>io.quarkus</groupId>
      <artifactId>quarkus-kubernetes-client</artifactId>
    </dependency>
    <dependency>
      <groupId>io.quarkus</groupId>
      <artifactId>quarkus-resteasy</artifactId>
    </dependency>
    <dependency>
      <groupId>io.quarkus</groupId>
      <artifactId>quarkus-openshift-client</artifactId>
    </dependency>

It took me a while to actually write and get the app to work though, partly because I went down the KubernetesClient route first. The example in the blog I linked to above uses the Kubernetes Client to pull the namespace list and then sets up a controller/listener looking for changes to the Node objects, outputting the Pods that are running on any (new) Nodes that are added to the Cluster.

I really like the event based nature of that example but I wanted something a little more simple so I could understand the mechanics. My app is an endpoint that has optional parameters for a *Project* name (which is why I needed the OpenShiftClient, as Projects don’t exist in the Kubernetes Object space) and an optional parameter which allows the service to list all the projects the configured logon can see.

This is where the code gets delightfully simple; in the old days I’d write an HttpURLConnection object and marshal/handle the call myself; using the RESTeasy stuff means I can annotate out a lot of the handcrafted functionality, particularly around converting the auth token to a client connection (done via the @inject by the Quarkus OpenShift stuff), and handling the endpoint/query parameters programatically.

So, the code for the entire app looks like this:

@Path("/endpoints")
public class KubeEndpoints
{
  public KubeEndpoints() {}

//  @Inject
//  KubernetesClient client;

  @Inject
  OpenShiftClient client;

  @GET
  @Path("/pods")
  @Produces(MediaType.TEXT_PLAIN)
  public String envtest(@DefaultValue("default") @QueryParam("namespace") String namespace, @DefaultValue("false") @QueryParam("list") boolean listProjects )
  {
    System.out.println( namespace );
    System.out.println( "Found " + client.projects().list().getItems().size() + " projects...");

    StringBuffer response = new StringBuffer();

    // Only render the project list if the parameter indicates to
    if( listProjects )
    {
      for (Project project : client.projects().list().getItems())
      {
        response.append(project.getMetadata().getName() + "\n");
      }
    }

    response.append( "\nTargeting " + namespace + "\n");

    for( Pod pod : client.pods().inNamespace(namespace).list().getItems())
    {
      //response.append( pod.toString() + "\n" );
      //response.append( pod.getMetadata().toString() + "\n" );
      response.append( pod.getMetadata().getName() + ", " + pod.getMetadata().getLabels() + "\n" );
    }

    return response.toString();
  }
}

A little gotcha – because the app uses an @inject it must have a parameterless constructor, which isn’t added by the Quarkus code generator.

What I really like, and where I think this is massively powerful, is the DSL style object interface the OpenShiftClient provides. If you look at the code extract for iterating through the Pods in a project, for example:

    for( Pod pod : client.pods().inNamespace(namespace).list().getItems())
    {
      response.append( pod.getMetadata().getName() + ", " + pod.getMetadata().getLabels() + "\n" );
    }

I really like the client.pods().inNamespace(xxx).list.getItems() – it’s a little verbose but it gives you, without having to parse the JSON returned from the underlying API calls, the ability to interact directly with the Object model from OpenShift.

If you scan the JAVAdoc for the OpenShiftClient at https://www.javadoc.io/doc/io.fabric8/kubernetes-model/1.0.12/io/fabric8/openshift/api/model/package-summary.html they’ve done a great job in exposing the full Object model for OpenShift.

For me the ability to programatically examine and create/modify the Objects is a gateway to doing some seriously cool stuff. The first question, of course, is why?

So, the concept of Operators raises it’s head here – my next target for a demo is to extend this so I have a Quarkus based Operator that monitors named Projects and automatically updates any created Pod with additional labels. This kind of functionality is really useful for production systems and is much more lightweight for things like label compliance that, say, ArgoCD (which I also love but for different, more ops-y reasons).

Anyway, I hope that made sense; the example can be downloaded from the Git repo and, if you have pre-logged on to an OCP cluster (via oc) you can just run the app up and it will standup an endpoint on http://localhost:8080/endpoints/pods – a full example of this is http://localhost:8080/endpoints/pods?namespace=sandbox&list=true and the output looks like:

Right, back to playing with it…….

Categories
Uncategorized

Spark-ly OpenShift….

For the last couple of weeks I’ve been experimenting with a customer using Spark on OpenShift and it’s a lot of fun. For those who have never heard of Apache Spark it’s a ‘unified analytics engine for large-scale data processing’. A next-generation Hadoop, so to speak.

I’d never really looked at Spark as I thought it was a: complicated and b: complicated. I never really got what Spark was all about. But working with this customer it started to become clear; the advantages of distributed and parallelised algorithms is massive for certain ‘massive data’ workloads.

So I taught myself how to use Spark, and more importantly, how to use it with Kubernetes/OpenShift. And to my surprise it was pretty simple once you got the basics.

This blog post will walk through the manual approach to using Spark on Kubernetes/OpenShift, using the Spark command-lines to push jobs and configuration to an OpenShift cluster, and then explain how to use the Google Spark Operator, which runs on OpenShift and provides a YAML based way to do the same thing as the command line. I’ll also show an example where I execute a Spark job across some shared storage; the key components of being able to execute a job, being able to execute a job using a YAML based approach and being able to attach storage for persistence away from the job lifespan gives you all the key pieces you need to start having fun with Spark.

I’ve chosen JAVA as my weapon of choice for the examples – the Spark images I have used come with some fantastic little examples and I’ve cribbed from them. You can also write your applications in Python, R or Scala; in fact when I demo Open Data Hub (the ML toolkit for OpenShift) I run a Python based Spark workload for calculating Pi (the classic example that is used), with ODH orchestrating the Spark Cluster under the covers.

I also wanted to be able to use my own code for the examples, just to demonstrate to the customer how to distribute their apps accordingly. So the first thing I did was to create a composite Docker Image containing the Spark runtime and framework plus my Application.

All of the example code is available at https://github.com/utherp0/sparkdemo

I used the Spark images provided by datamechanics from Docker Hub at https://hub.docker.com/r/datamechanics/spark

The Dockerfile to create my composite Spark image was very simple and consisted simply of:

FROM datamechanics/spark:jvm-only-3.0.0-hadoop-3.2.0-java-11-scala-2.12-latest
COPY target/sparktests-1.0.jar /opt/

I ran this is the root of my repo; having built the application using Maven the jar file was in the target/ directory – the Dockerfile simply added the application into the /opt/ directory of the composite image. I then pushed that to my quay.io account.

I then installed the Spark framework on my Mac (simply using the brew command).

Pictured – Hello Spark….

I logged onto my OpenShift cluster and created a project called sparkexample. Then, to run the Spark workload, it was as simple as issuing the following command:

spark-submit --master k8s://https://api.cluster-d2ed.d2ed.sandbox1722.opentlc.com:6443 --deploy-mode cluster --name spark-pi-uth --class org.uth.sparkdemo.PiSparkTest1 --conf spark.executor.instances=2 --conf spark.kubernetes.namespace=sparkexample --conf spark.kubernetes.container.image=quay.io/ilawson/sparktest1:latest local:///opt/sparktests-1.0.jar

I’ve bolded the components of interest – the master is where the Spark job will be scheduled; in this case I’m targeting Kubernetes (k8s://) and providing the API address for my OpenShift cluster.

The name is the name that will be applied to all the objects created within the namespace.

The class is the actual workload I built in my JAR file.

The executor instances is how many ‘workers’ I want to create to execute the job – Spark works by creating a ‘driver’ which then orchestrates and controls/aggregates the ‘executors’. This is all done for you by the Spark interaction with the Cluster API. In this case I have indicated I need two executors.

I then target the namespace I created using a conf entry for spark.kubernetes.namespace.

I then provide the composite image location (which is my prebuilt image with the Spark framework and my JAR file in it).

I then provide the location of the workload as the last parameter; in this case it is a local file within the image (local:///opt/sparktests-1.0.jar) which I created using the Dockerfile.

The fun thing is that this doesn’t work, because of OpenShift’s clever security model that stops naughtiness. What happens is the driver is created, but then doesn’t have the access, through the serviceaccount you get by default in OpenShift, to do the things the driver needs to do (create a Pod, create a configmap, create a service).

The easy (but not the right way) to fix this is to simply give the default service account admin rights to the namespace. The correct way, which is much better, is to create a serviceaccount in the project specifically for Spark jobs. So I did that.

I then created a ‘Role’ which had only the operations the Spark driver needs thus:

And finally a ‘RoleBinding’ to assign that Spark role needed to my new Service Account:

Now I just have to add:

spark-submit --master k8s://https://api.cluster-d2ed.d2ed.sandbox1722.opentlc.com:6443 --deploy-mode cluster --name spark-pi-uth --class org.uth.sparkdemo.PiSparkTest1 --conf spark.executor.instances=2 --conf spark.kubernetes.namespace=sparkexample --conf spark.kubernetes.authenticate.driver.serviceAccountName=sparkuser --conf spark.kubernetes.container.image=quay.io/ilawson/sparktest1:latest local:///opt/sparktests-1.0.jar

To my spark-submit. I then watched the Pods within my namespace (the Error one was the attempt we tried without the serviceaccount). The driver started, created the executor Pods, executed the workload in those Pods, terminated those Pods and aggregated the results. Et voila….

What’s nice is that using the serviceaccount allows the Cluster ops to control exactly what the Spark jobs can do; this is part of the OpenShift system and provides a superb security model.

You can also use the spark-submit approach to run workloads that have shared storage as well – the spark-submit command provides configuration options for attaching PVCs to both the driver and executor Pods; the only gotcha is that to orchestrate jobs using a piece of shared storage you must express the PVC to both the driver and the executors thus:

  --conf spark.kubernetes.driver.volumes.persistentVolumeClaim.rwxpvc.options.claimName=(claimname) \
  --conf spark.kubernetes.driver.volumes.persistentVolumeClaim.rwxpvc.mount.path=(mount dir for driver) \
  --conf spark.kubernetes.executor.volumes.persistentVolumeClaim.rwxpvc.options.claimName=(claimname) \
  --conf spark.kubernetes.executor.volumes.persistentVolumeClaim.rwxpvc.mount.path=(mount dir for driver) \

Interestingly this also works with PVCs that are created as ReadWriteOnce, even though the conf specifies rwxpvc….

There’s a nice little example provided with the Spark framework image that does a distributed wordcount (total of individual words) – as a test I ran a spark-submit for that job, having created a quick PV in OpenShift, mounted it to a Pod, created a file (/mnt/playground/words.txt) and then provided that PVC as conf parameters into the spark-submit.

The command looks like:

spark-submit --master k8s://https://api.cluster-d2ed.d2ed.sandbox1722.opentlc.com:6443 --deploy-mode cluster --name spark-pi-uth-wordcount --class org.apache.spark.examples.JavaWordCount --conf spark.executor.instances=2 --conf spark.kubernetes.namespace=sparkexample --conf spark.kubernetes.authenticate.driver.serviceAccountName=sparkuser --conf spark.kubernetes.container.image=datamechanics/spark:3.1.1-latest --conf spark.kubernetes.driver.volumes.persistentVolumeClaim.rwxpvc.options.claimName=wordclaim --conf spark.kubernetes.driver.volumes.persistentVolumeClaim.rwxpvc.mount.path=/mnt/playground --conf spark.kubernetes.executor.volumes.persistentVolumeClaim.rwxpvc.options.claimName=wordclaim --conf spark.kubernetes.executor.volumes.persistentVolumeClaim.rwxpvc.mount.path=/mnt/playground local:///opt/spark/examples/jars/spark-examples_2.12-3.1.1.jar /mnt/playground/words.txt

And when the driver completes the output looks like:

Which works a treat – that example effectively mapped persistent storage into the driver and all of the executors.

Whilst that is nice (I think so) the commands are starting to get a little unwieldy, and if you add in the configuration you have to do (setting up the roles/role-bindings and the like per namespace) it feels a little clunky.

To make it much easier to use there’s an Operator (as there always is, nowadays) that wraps it all up nicely for you. Currently there are two you can choose from on the Red Hat Operator Hub, but going forward Red Hat will be contributing to the Google Spark Operator.

I installed the Google Spark operator into another namespace using the OpenShift operator hub – one of the nice features is that the Operator also installs a serviceaccount (“spark”) which is pre-configured with the appropriate roles for running spark workload kubernetes components, negating the need to create a role yourself.

You will also note that unlike a lot of ‘community’ Operators the Spark Operator capability level is nicely almost complete. It’s a mature Operator, which is why Red Hat are contributing to it rather than re-inventing the wheel.

And this is where it gets fun – instead of constructing a verbose ‘spark-submit’ command you simply create an appropriately formatted piece of YAML and submit it in the namespace where the Operator is installed. For instance, the first example we did earlier (my version of the PiSpark example using a composite image) now looks like:

apiVersion: sparkoperator.k8s.io/v1beta1
kind: SparkApplication
metadata:
  name: uthsparkpi
spec:
  sparkVersion: 3.1.1
  type: Java
  mode: cluster
  image: quay.io/ilawson/sparktest1:latest
  mainClass: org.uth.sparkdemo.PiSparkTest1
  mainApplicationFile: local:///opt/sparktests-1.0.jar
  sparkConf:
    "spark.kubernetes.authenticate.driver.serviceAccountName": "spark"
driver:
  serviceAccount: 'spark'
  labels:
    type: spark-application
  cores: 1
  coreLimit: 1
executor:
  instances: 2
  cores: 1
  coreLimit: 1

What’s also nice is you can push direct spark-submit conf settings via the YAML as well. I can then execute the job in the namespace using the oc command by simply ‘oc create -f’-ing the file.

Here’s a screengrab of the job in action – the operator runs as a Pod in the namespace, it receives the custom-resource for a ‘SparkApplication’ and creates the driver Pod, which then creates the Executors it needs and runs the workload.

Once the job has finished the driver pod completes and I can view the logs of the driver pod to get the aggregated response:

In order to execute the workload that requires persistent volumes (and you can add as many volumes as you like through the same methodology) I have the following SparkApplication defined as YAML:

apiVersion: sparkoperator.k8s.io/v1beta1
kind: SparkApplication
metadata:
  name: uthwithpvc
spec:
  sparkVersion: 3.1.1
  type: Java
  mode: cluster
  image: datamechanics/spark:3.1.1-latest
  mainClass: org.apache.spark.examples.JavaWordCount
  mainApplicationFile: local:///opt/spark/examples/jars/spark-examples_2.12-3.1.1.jar
  sparkConf:
    "spark.kubernetes.driver.volumes.persistentVolumeClaim.rwxpvc.options.claimName": "playground"
    "spark.kubernetes.driver.volumes.persistentVolumeClaim.rwxpvc.mount.path": "/mnt/playground"
    "spark.kubernetes.executor.volumes.persistentVolumeClaim.rwxpvc.options.claimName": "playground"
    "spark.kubernetes.executor.volumes.persistentVolumeClaim.rwxpvc.mount.path": "/mnt/playground"
  arguments:
    - /mnt/playground/data/words.txt
driver:
  serviceAccount: 'spark'
  labels:
    type: spark-application
  cores: 1
  coreLimit: 1
executor:
  instances: 2
  cores: 1
  coreLimit: 1

Notice this time rather than set the serviceaccount as a ‘conf’ entry I have used the fully qualified YAML fields (the driver: serviceAccount:).

So that was a very brief introduction but I hope there’s enough core components there to allow you to get playing – once I understood the mechanics of the Spark orchestration it all clicking in place and was a lot of fun to play with…..

Categories
Uncategorized

Just what on earth *is* a Cloud Event?

One of the best things about working for a company like Red Hat is that it gives you a chance, if you want it, to get involved with any aspect of the company. I volunteered, this year, to help out with coding the demo for Summit and ended up writing a set of functions, in Quarkus, driven by Cloud Events for processing the game state (for those who missed it we did a retro-styled version of Battleships completely event driven, node.js front end and game server, state update engine in functions and state held in a three cluster geo-replicated instance of Red Hat Data Grid – it was fun).

This entailed learning just what a Cloud Event actually was; not the theory behind it, which I’ll explain in a second, but what it was under the covers, and this is what I want to share and explain in this blog post because I personally feel that this kinda of event-driven, instantiated when needed model for writing micro-service components of a bigger system lends itself wonderfully to the on-demand and highly efficient way containerised applications can be orchestrated with Kubernetes and OpenShift.

When I started to look at it all I was seriously confuddled; the nice thing about the Cloud Event stuff is that it is abstracted to the point of ‘easy-to-use’, but I come from a background of needing to know exactly what is going on under the covers before I trust a new technology enough to use it. Yeah, I know, it’s a bad approach especially with the level of complexity of things like, say, Kubernetes, but it’s also nice to know where to look when something breaks under you.

So, the theory first – the idea behind Cloud Events is to simplify the mechanisms by which event driven applications can be triggered and routed within a Kubernetes and OpenShift cluster. In the old days (i.e. last week) a developer had to setup the queues, the connections, write their software around a specific technology etc etc. With Cloud Events it becomes superbly simple; you write your app to be driven by the arrival of a named event, the event itself is just a name and a payload, which can be anything. It’s almost the ultimate genericisation of the approach; again, in the old days, you used to choose to go down one of two routes, you *specialised* your approach (strictly defined interfaces, beans and the like) or you ‘genericised’ where your software would receive and then identify the payload, and act accordingly. Approach one leads to more, but more stable, code. Approach number two is much more agile for change.

So, long story short, the Cloud Event approach takes away all the complexity and required knowledge of the developers for the process of receiving the event and lets them just get on with the functionality. It also ties in very nicely with the knative approach, where an application is created on demand and exists for the duration of the required interaction, then goes away.

And I understood that. I just didn’t understand what a Cloud Event actually was. So I did a little digging and, with the help of the guys writing the implementation, it became clear.

Firstly, and this was the sticky bit for me that I didn’t understand, Cloud Events are simply http posts. Nothing more complicated than that – you want to create an event, you connect to the target broker and push a post request with the appropriate (and this is the key) headers set. There are plenty of very useful APIs and the like for processing events – for example the Quarkus Funqy library, which abstract all the handling at the client side, but it was the fact that to create and send a Cloud Event you simply post to a target URL that opened my eyes on how easy it was.

A very important link I was given, which explained the ins and outs of the Cloud Event itself, was https://github.com/cloudevents/spec/blob/v1.0.1/spec.md – this is the working draft (as of May 2021) of the Cloud Event standard.

It’s very interesting to look at the mandatory header fields for the Cloud Event as they, in themselves, describe what makes Cloud Events so good and the thought process behind them – you have the id which is the unique identifier for this event; you have the source which is a context label; the combination of the id and source must be unique (within the broker) and acts as both an identifier and a context description which is neat. And you have the type which is the identifier used for routing the events (in actuality the type is related to the triggers; a trigger listens for an event of that type on a broker and forwards it to a processor as a Cloud Event).

And back to the theory – why is this such an attractive technology, to me at least? Well, it bridges two of the major problems I’ve always seemed to have when designing and implementing these systems. The idea of microservices has always appealed to me, even back when the idea didn’t exist; the concept of being able to hive off functionality into a separate unit that could be changed without having to rebuild or redesign the core of an application is very attractive, especially when the technology changes a lot. But micro-services were always a bit of a hassle to me because I didn’t want to spend my time writing 70% of boilerplate code that had nothing to do with the actual functionality (the wrappers, the beans, the config, all the bits to stand up a ten line piece of JAVA code that actually did something).

Cloud Events solves those problems and does it in spades; the abstraction to a simple format (name and payload), the simplicity of creating the events themselves (if you look at the source code in the image at the top of the blog you’ll see how easy it is to create and send a Cloud Event), it’s got the balance of configuration and code just right.

I’m intrigued to see where this technology goes and how the industry adopts it; I think they will, not only is it very powerful it’s also, and this is the most important bit, very easy to write software around. And that’s the kicker; make it easy and useful and it will get adopted big time.

Categories
Uncategorized

Ge(i)tting to Grips with GitOps

I’ve been talking to people about OpenShift for a long while now, and one of the biggest issues I’ve seen with customers is that missing bit of glue between the rabid developers throwing together a cutting edge application and the Ops teams deploying it in the Real World (TM).

With the advent of Kubernetes and it’s delightfully cool declarative object model the opportunity to make it easier and, more importantly, consistent has led to the rise of the ArgoCD project, hosted at https://argo-cd.readthedocs.io/en/stable/

I don’t know about you but I have an oddly ordered (cough, OCD) mind; I like things tidy. I’ll spend hours indenting code, making sure comments are verbose (I used to get accused of writing novels of comments) and the like; being honest I like things to be ordered and controlled. And that’s where ArgoCD comes in, in spades.

So, to put it simply, what ArgoCD allows you to do is to group resources, apply resources from a controlled source, and maintain and synchronise those sources automatically. It takes declarative definitions for objects within Kubernetes backed by git controls, applies them appropriately and provides one of the best UIs I’ve seen in a while for managing and observing the process and controls.

Enough praise (I could go on for hours, there’s something brilliant about the application of controls that ArgoCD provides), let’s walk through a basic couple of examples to show you it working in practice. Again, as I’m an OpenShift geek, these examples will be done with the OpenShift GitOps operator.

Basically, what Red Hat have done, as with a lot of the Open Source projects, is to integrate it into the OpenShift ecosystem (the RBAC, monitoring, logging) and provide a seamless experience with the OCP platform. ArgoCD is the same at the core, so these examples should work on a basic Kubernetes system (aside from the addition to the OCP UI example of course).

I’ve also lifted a lot of the basic operations from the fantastic https://github.com/siamaksade/openshift-gitops-getting-started guide; I would wholeheartedly suggest reading it in full after this if you want more of an introduction.

In terms on installation feel free to skip this paragraph, but if you haven’t and want to know how simply log on to an OCP4.x (supported) system (which you can create via https://cloud.redhat.com/openshift) with Cluster Admin rights, install the ‘OpenShift GitOps operator and then go to the ArgoCD route – you’ll need the administration password and that can be obtained by logging onto the Cluster via ‘oc’ and running ‘oc extract secret/openshift-gitops-cluster -n openshift-gitops –to=-‘ which will give you the password you need.

Pictured – the details from the OperatorHub for OpenShift GitOps

Back up a step – so what is GitOps? Put simply it’s the approach of defining the state of your estate, both configuration of the Clusters and the Applications, in a controlled code way, via a Git repo. Then the Cluster can be brought into a compliant state by applying the configuration, applications can be deployed and kept at a consistent state by applying the latest version of their configuration from the git repo. It also means that an Op can determine the exact state of an application/cluster programmatically, and also perform repeated and consistent installations of cluster state/applications. It’s, well, tidy.

So back to the example – I have setup two ‘pots’ of configuration in a github repo (see https://github.com/utherp0/gitopsdemo1). There are two subdirectories in that repo, one called ‘cluster’ and the other called ‘app’. These are created by me; ArgoCD has the concept of an ‘Application’ which is a group of definitions sourced from the same github repo; in this case I’ll be creating two ‘applications’, the first a couple of Cluster objects and the second an actual application.

The ‘cluster’ subdirectory contains two pieces of YAML – one defines an addition to the OpenShift UI (it basically adds a clickable link/icon to the applications tab in the UI using a console.openshift.io/v1/ConsoleLink object) and the other is a namespace that I want created on my cluster.

For reference the definition for the ConsoleLink looks like this (it’s just a declarative piece of YAML):

apiVersion: console.openshift.io/v1
kind: ConsoleLink
metadata:
  name: application-menu-myblog
spec:
  href: 'https://devepiphany.org/home/'
  location: ApplicationMenu
  text: DevEpiphany Blog
  applicationMenu:
    section: Blogs
    imageURL: https://i.ibb.co/pZ0Lxdb/Logo-Red-Hat-Hat-Color-RGB.png

Note that, as expected, there’s nothing ‘ArgoCD’ about these files; they are just definitions of various objects I want in my cluster.

The ‘app’ directory is slightly different; I actually created it for a Red Hat Advanced Cluster Manager demo (ACM takes kustomise manifests as a definition for ‘applications’ that can be deployed cross cluster). ArgoCD works with kustomise – if you have a kustomise manifest in the directory (or sub-directories – ArgoCD can do a recursive dive through the repo if indicated, more in a moment) that will be applied; in the case of this app the manifest defines three components, a deployment, a service and a route. These additional objects are present in the repo subdirectory.

The Deployment defines two replicas and the image to deploy – so the application I want deployed is two Pods containing a pre-built image, a service and a route so the app can be reached from outside of the cluster.

So, having installed ArgoCD (in this case, OpenShift GitOps via Operator) and logging on with the creds I get the following screen:

Pictures – empty and ready to roll….

First thing I’m going to do is add the cluster configs as an app; I click on ‘+New App’ and add the following – the Application Name is ‘clusterconfigs’, the project is ‘default’, I leave the sync policy as ‘Manual’ **, set the source repository to https://github.com/utherp0/gitopsdemo1 with the path set to ‘cluster’.

For the destination I choose the local cluster on which ArgoCD is running (by default this is https://kubernetes.default.svc) and the namespace as ‘default’ within the cluster. I also click ‘Directory Recurse’ (although in this case all the YAML components I want are in the cluster directory).

I then hit create and et voila, we have a managed application within ArgoCD…..

Pictured – my first ArgoCD app by Uth, age 52

You’ll immediately notice that the status of the app is ‘missing’ and ‘out of sync’ – this is because we chose to do a manual sync, which we haven’t done. So the next thing to do is to sync that application against the git repo, which I do by clicking on the ‘Sync’ button.

This is where it gets nice – shown below is the panel that pops up for synchronising; you’ll notice it already knows the content of the git repo target (by scanning ahead) and shows the files that will be sync. You can choose to remove files here, although that isn’t best practice. So I’ll just hit ‘synchronise’.

Pictured – ArgoCD is clever enough to warn you, in no uncertain terms, if you untick any of the files that it wants to sync

Once I have hit ‘synchronise’ it takes me back to the overview but now my application is rendered thus:

Pictured – healthy and synced…

So what has this done? ArgoCD has pulled the files from that target repo and executed them against my cluster. To prove that it has I can go back to my Cluster UI and select the Applications button, which now has the additional entry for this blog added.

Pictured – which brings you here, which is a bit Inception-y

I also created a namespace, my GitOps sandbox for messing around in, and that is visible as well.

oc get projects | grep gitops
openshift-gitops                                                          
sandbox-gitops                                                      

So, I now add another ‘application’ at the ArgoCD side; this time I set it to automatically synchronise and point it at my app directory on the repo that has the kustomise manifest. I also target the namespace I have just got ArgoCD to create, sandbox-gitops.

And then I hit a little snag. The application cannot sync because OpenShift is behaving itself, security-wise; by default the ArgoCD service account is limited to its own namespace. I fix this by adding the ArgoCD service account as an admin user on the namespace I created – I could (and should) have done this by creating a role-binding piece of YAML and adding that to the cluster repo (add to my todo list).

And ooo, I like the UI for this; if I click on the Application in the ArgoCD project viewer it displays exactly what it has synced and created thus:

Pictured – all the right objects

You can see the service, the route and the deployment, which has a replicaset and is running two Pods. It has correctly synced the files from the repo and applied them as required.

I then hopped onto github and manually edited the deployment, setting the replicas to 4. I then popped back to ArgoCD, hit refresh on the ‘devexapp’ and et voila, it had synced my changes and now:

Pictured – four Pods….

So yeah, a bit of a pithy example but you can see the power of this. My intention is, from now on, to craft kustomise manifests for all my reproducible demos and use ArgoCD internally within my demonstration clusters to set them up and keep them up to date against my git repo.

So that was a lightning fast overview of some of the functionality of ArgoCD from a basic view; now to work on crafting my demos……

Categories
Uncategorized

Fun with knative (part 3)

Apologies for the gap in posts, I’ve been working on some new tech around the Knative stuff that is absolutely brilliant; I will write a blog post on it as soon as I can as it is a game-changer.

In fact, I’ll give you a quick overview before finishing off the Loom demo stuff; Cloud Events. Put simply, there is a new way of writing event based applications/functions in OpenShift/Kubernetes based on an abstracted and simplified event model. It was designed so as to allow devs to build disconnected applications with ease; put simply the framework provides an event model which is very simple, just a Cloud Event message type and a payload, and the ability to setup namespace-specific brokers, either in-memory or linked to Strimzi/Kafka. This is wired into Knative services and the forthcoming ‘functions’, which are triggered by the arrival and routing of a typed Cloud Event.

What makes it so easy is, literally, the ease of it. Once you have installed OpenShift serverless, for example, you simply create a broker using:

apiVersion: eventing.knative.dev/v1
kind: Broker
metadata:
 name: default

You then write your functions/Knative services to receive a Cloud Event, for example using the brilliant ‘Funqy’ Quarkus libraries, and then hook your app into the broker using a ‘trigger’, such as:

apiVersion: eventing.knative.dev/v1
kind: Trigger
metadata:
  name: trigger-hit
spec:
  broker: default
  filter:
    attributes:
      type: hit
  subscriber:
    ref:
     apiVersion: serving.knative.dev/v1
     kind: Service
     name: battleships--hit

Note the simplicity; you simply specify the broker name and the Cloud Event type as the filter and the Knative serverless does all the wiring for you.

If anyone is interested I have written a quick emitter app that uses the node.js Cloud Event SDK for providing events to a Broker to test and see the stuff in action – have a peek at https://github.com/utherp0/cloudeventemitter – you simply provide the broker address (format shown in the repo), the Cloud Event type and the payload and et voila. Brilliant stuff; I will write a deeper blog soon going into the use of a Kafka channel for the broker instead and multiple stage event routing (where a function emits a Cloud Event back to the broker and other functions are triggered by it).

But I appear to have digressed, *again*, so let’s finish off the Loom demo stuff just to show the basics and cool side of knative serving.

If you remember from the first post, the concept of knative serving allows you to simply define an application that is autoscaled down to 0 when it is not being used (simplification; what actually happens is that the application sits in an inactivity loop and when it expires a pre-set time the system downscales it to 0 Pods – this is overwritten and reset, and the application scaled up, when traffic arrives at the ingress point.

I wanted a visually fun demo to show this behaviour in action and also highlight another important feature of the knative services; the concept of ‘revisions’. A revision is another version of the deployment of the application. It has the same application name, and traffic into the application group is load balanced according to a configurable percentage of traffic but the nice thing is that each of the revision behaves, from a knative perspective, independently.

An example of this, using the Loom demo, is that I spin up four knative services. Each services has three revisions; in actuality they are same image/container with differing environment variables – like applications in OpenShift the determination of a version of the application is the image from where it is created and also the configuration of the way in which it is deployed; deploying an application in OpenShift and then changing the environment variables that are exposed to the deployment creates another iteration, or version, of the deployment. And the same logic applies to revisions. In the case of the Loom demo I deploy a knative service and then create revisions for it by altering the environment variables.

So, for the Loom demo I have a simple RESTful endpoint application that returns a colour. This colour can be overridden by an environment variables. The demo itself is deployed by a good old fashioned shell script (bad Me, I really should use/learn Ansible) and it’s worth understanding the way in which this script works.

The full source of the demo is available at https://github.com/utherp0/knativechain along with instructions for setting it up – the previous blog post covered the humdrum bit of setting up and configuring the Operators so do that (not that exciting) bit first before you deploy the demo.

The script is also interesting in that it hand crafts the applications and it’s useful to understand those steps as well as the key to exploiting this kind of technology is knowing just what is going on under the bonnet. So…..

(from the setup.sh in the scripts directory of the repo….)

oc create -f ../yaml/link1-is.yaml

The first thing we do is create the image stream in OpenShift. This is an object that represents the image that is used for the application – in this case we will be building the image from source but in order to do that we need a placeholder/object definition to refer to – this is expressed in the *-is.yaml files and shown below for reference:

apiVersion: image.openshift.io/v1
kind: ImageStream
metadata:
  name: link1
spec:
  lookupPolicy:
    local: false

Nice and simple because I don’t like complexity – it complicates things…..

The script then sets up the build config for the applications – this is the ‘cookie cutter’ for building the endpoints we will use and looks like this:

apiVersion: build.openshift.io/v1
kind: BuildConfig
metadata:
  name: link1
spec:
  output:
    to:
      kind: ImageStreamTag
      name: link1:latest
  postCommit: {}
  resources: {}
  runPolicy: Serial
  source:
    contextDir: /apps/link1
    git:
      uri: https://github.com/utherp0/knativechain
    type: Git
  strategy:
    sourceStrategy:
      from:
        kind: ImageStreamTag
        name: nodejs:12-ubi7
        namespace: openshift
    type: Source

Now this is great and I love these build configs to death, but don’t get attached to them; one of the forthcoming features in OpenShift is a new and simplified way of doing this kind of builds that is more Kubernetes-ish. But for now we have build-configs; this object def defines the way in which the application is constructed. Note the fact the source for the application comes from the same repo, is built on top of the UBI (Universal Base Image) for RHEL7 and using the node.js version 12 framework. Also note that the output of the build-config ties, in this case, into the image stream defined by the first object definition.

These are all pushed into the OpenShift cluster using the ‘oc create -f’ command that literally throws the object definition given the context of the logon (the script assumes you have logged into OpenShift in advance but does create the project/namespace in which all the components exist).

Once we have defined the four image streams and four build configs, one each for the four instances of the application/knative service we want to use, we start doing the fun stuff.

oc start-build link1

The script now gets OpenShift to kick off builds for each of the defined build configs we have instantiated. It’s that easy; once we have a build config defined we can run it as many times as we want (and because, as in this case, the source is being drawn from a git repo we can simply repeat the build when we change and commit code).

This process produces the four instances of the application and delivers composite images to the four image streams we have defined. This is the foundation of the demo as everything from now on is knative service based and uses these images. So far we have just done the basics and gone from an empty project to four ready-to-deploy images.

The script then uses the ‘oc create -f’ approach to setup the four knative services – there are actually two ways to create knative services (not counting the UI for now); knative has its own command line, kn, which does all thing knative service related but for the sake of the demo and simplicity I wanted to have an easy to digest set of yaml to show the bits and pieces you need for the service, an example of which is shown below:

apiVersion: serving.knative.dev/v1
kind: Service
metadata:  
  name: link1
spec:
  template:
    metadata:
      name: link1-v1    
    spec:
      containerConcurrency: 0
      containers:
      - image: image-registry.openshift-image-registry.svc:5000/chaintest/link1
        name: user-container
        readinessProbe:
          successThreshold: 1
          tcpSocket:
            port: 0
        resources: {}
      timeoutSeconds: 10
  traffic:
  - latestRevision: true
    percent: 100

Also there is a little, err, ‘omission’ with the ‘kn’ client currently which I have raised an RFE on around the setting of initial timeout; I’ll explain that in detail in a second after I explain what this object is creating.

What this does is create the wiring around a knative service, in this case defining the template (which includes the container image we have just built – the image-registry URL is the internal location of the image registry in OpenShift). It also sets the default traffic for the knative service, in this case saying that 100% of the traffic into this service will go to the latest revision.

As part of the demo I wanted the timeout for the knative services to be low; by default they are set to 30 seconds after the traffic ingress. The problem with using ‘kn; to create the service is that it does not (at the moment) have the timeout for the service as part of the configuration you can give a service – you can see what the problem is from my perspective, with an automated build – if I used the ‘kn’ create I would have to change the timeout *post* creation, which would, ta dah, create a new revision (the new knative service would be defined with the 30 second timeout). Changing the timeout would create a *second* revision (the knative services are effectively immutable once created by design). Hence using YAML instead where I can set the default timeout.

When the script has created all four of the knative services it will, if you watch the topology page, spin up the Pods as part of the creation process. This is by design; you want your application to be responsive and also know that it has deployed correctly. I am constantly surprised when demoing it and often a customer will ask ‘if knative serving services are only deployed on traffic how come they spin up when you initially deploy?’.

Then the fun bit – the script then uses the ‘kn’ command to create the different revisions for each of the four services – as mentioned before it uses an ENV variable value to differentiate between the versions, so we use the ‘kn’ client to create labelled new versions of the service thus:

kn service update link1 --revision-name=v2 --env COLOUR=purple

Our four services are called link1 through link4, the script provides a new colour through the environment variable COLOUR and labels the revision accordingly (in this case v2).

So, when the script finishes that part we now have four knative services with three revisions (v1, v2 and v3). And now we do the magic in terms of traffic ingress using:

kn service update link1 --traffic link1-v1=40,link1-v2=30,link1-v3=30

This is the cool bit – we have now assigned, in this case, 40% of traffic for the link1 service to the v1 revision, 30% of traffic for the link1 service to the v2 revision and 30% of traffic for the link1 service to the v3 revision. With just those two commands we have created three different versions, revisions, of each of the services.

The script then sets up the demo app which is a node.js generated front end which provides a webpage that randomly calls the four services to get a colour to render, When the page randomly calls service link1 through link4, each of them then returns one of three responses depending on the traffic load.

But each of these three responses is a *separate* Pod which adheres to the timeout scale-down rules of the knative framework. So effectively you end up with 12 endpoint Pods which are spinning down and up depending on where the traffic lands.

Yeah, it’s a bit pithy, but the concepts are superb and underpin the next generation of efficient application design – these applications are web-based stateless endpoints that, put together, provide a composite output (the loom).

As I said at the start of this little foray into knative, I’ve been looking at the next step from here the last month or so, and I’ll be writing a blog post very shortly on that – Cloud Events. They make designing the next generation of stateless applications even easier but I’ll hold back from enthusing too much right now….

So, get yourself access to an OpenShift cluster and have a play with this demo, it’s reasonably simple but I’ve tried to encapsulate all the bits you need to start thinking about using knative serving in anger……

Categories
Uncategorized

Fun with knative (part 2)

So, if you read my little sojourn into the delicious architecture that is Kubernetes (K8S) you’d have read a little bit on Operators. This part of the knative blog will talk about how to install, and test, the OpenShift Serverless operator which adds the knative functionality to the Cluster.

I’ll be working with an OpenShift 4.6 cluster here, so the screenshots will reflect that; this post will be a little of a ‘do this, do that’ kind of nag but stick with it; I’ll explain what I’m doing at each point (and any gotchas which I seem particularly good at finding; basically I break everything I touch, sometimes even intentionally).

What am I trying to do? Set Stuff Up…..

So, OpenShift supports a serverless approach as documented in the first of these posts, but when you install OpenShift it doesn’t pack your cluster full of stuff you might not want. Using the Operator approach, again something I went into briefly in the last interlude blog post, we can add the bits we need to the cluster.

By installing an Operator what OpenShift does is to download and run the Operator itself as an application (amusingly using another operator, the Operator Lifecycle Manager operator, which does for operators what operators do for the applications they control and monitor. Now trying saying that sentence four times without falling over).

And now to do it…

OpenShift is nice in that the UI for adding Operators from the operatorhub.io (a community site where organisations can commit their own Operators for use by others) provides all the complexity in a simple to use interface.

Pictured – this is the integrated UI within the OCP console for perusing and choosing the Operators

What I do first is to search for the Serverless operator:

Pictured – there it is…

Then I pick it and install it with all the defaults:

Pictured – overview of the serverless operator

So what is it doing? Well, as you can see from the picture below, the Operator creates a namespace (openshift-serverless) and downloads and runs the Operator. What it doesn’t do is……..actually install the serverless technology.

Pictured – a lot of nice complexity in a simple UI

Once you hit install you get a dynamic page that tells you the progress of the installation; this in and of itself is pretty cool, in the old days (i.e. previous versions) it didn’t really tell you what was going on which was a bit hit and miss). Once the Operator is installed you can click on the helpful ‘View Operator’ button and actually get the serverless serving stuff going.

The Operator view gives you a number of context specific menus and the ability to kick off the APIs supported by the Operator. We’re going to play with the Knative Serving stuff, so I click on that one (create instance) and hit the first gotcha – the knative serving engine *must* be deployed in the knative-serving namespace. Interestingly the Operator creates that namespace, but when you go to the API screen the UI is still actually in the openshift-serverless namespace, so you need to remember to change the namespace, at the pulldown at the top-left of the ‘Create Knative Serving’ dialog, to knative-serving before clicking on Create (you will have to choose the OpenShift Serverless operator in the namespace and choose to setup the Knative Serving component.

Fast forward to when it says it has finished and, wahey, we can start to play with it.

One of the other nice things about the Operator framework in OpenShift is the UI itself is dynamic depending on the Operators you have got installed – now we have the serverless operator running we are given the option, when we create an application, to instantiate it as a knative service rather than a deployment (or an OpenShift deployment config).

So, in order to test it is all going fine I’m going to create an application; I have a couple of test apps I use that provide RESTful and http endpoints, and I’m going to use ‘ocpnode’, a quick-to-compile application from my github repo.

Here’s where the dynamic nature of the UI shows itself; when I create the application via the developer viewpoint, by choosing ‘Add+’, ‘From Catalog’ and the node.js builder image (more about that in the next interlude post) I now have the ability to choose to make the application a knative service:

Pictured – selecting the knative service option makes OpenShift deploy the application using the serverless operator

Now, while the image is building the knative service is unresponsive; clicking on the route to go to the application will return the ‘Application is not running’ page from OpenShift. This is down to the way that K8S actually works; as I mentioned in the interlude blog you ask nicely for K8S to change the state of something and then it will do it asynchronously. In this case the image is not in the registry as it is being built, so the ingress traffic has nowhere to land.

When the build completes the knative service effectively ‘dry runs’; the system simulates ingress traffic and the Pod is started. Once the timeout for inactivity passes the operator automatically down-scales the Pod to 0, but it is ready for requests.

I like the way OpenShift renders the knative service in the topology view; you can instantly see the state of the Pod and the traffic weighting.

Pictured – post-build the Pod has been started and scaled-down, ready to be spun up when traffic arrives at the ingress point

Now, about the traffic weighting; OpenShift serverless supports the concept of revisions. These are different versions of the same service that are served from the single service ingress point; in English you have one FQDN (fully-qualified domain name) and OpenShift will intelligently route the traffic to multiple different copies of the application based on a traffic weighting.

A revision is actually one of a number of things; simply changing the configuration of the deployment (i.e. the bits around the image as opposed to a different version of the image) will create a revision (good example, you have an app that is driven by an ENV, say ‘MODE=debug’ and ‘MODE=production’. Changing this ENV variable as part of the K8S deployment for the service will create a new revision), as will rebuilding the image itself.

One of the nice features of knative is the command-line, kn. This is a kube-config controlled command (kube-config basically reflects the logged in state on your machine; doing a login to K8S via kubectl or oc sets this state, kn uses the state).

If I now click on the route icon at the top of the Knative box on the UI it will pop up a tab and call the route – this pushes traffic into the knative service handler and et voila, the Pod will spin up (if it has spun down while I’ve been typing) and serve the page. After a while, defined in the container spec for the knative service, as highlighted below, the Pod will scale down. Nice…

Pictured – highlighted, the timeout of the knative service

Right, next blog post I’ll show you the cool virtual ‘loom’ demo you can run yourself to see this concept in action with four services, each with three revisions, and a randomised front-page that calls them periodically to build a pattern….

Categories
Uncategorized

Interlude – Kubernetes Koncepts….

Ahh, Kubernetes. I love Kubernetes; well, kinda. It’s a complicated but very well designed and written piece of software that appeals to all the old-school Object Oriented neurons in my head while making the rest of my mind go ‘what is happening?’.

Aside from the mad name (which is pain to spell if you have to type it more than one hundred times in a design document/slide deck, hence the casual abbreviation to K8S which I will, thankfully, use from now on) the whole K8S thing really appeals to me; mostly from a design perspective as when you get under the covers, which is what I will (probably badly) try to explain in this post, it’s deliciously simple and clever.

However, as anyone who has battled to install and maintain a non-OpenShift version (excuse the flag waving, I’m a massive OpenShift fan and would be even if I wasn’t an employee of Red Hat), “Kubernetes is Hard (C)“.

When I first delved into it as part of OpenShift 3 it was a complete mystery to me, so I spent a little bit of time reading the design documents for it and after that…..it was still a mystery to me.

But then I started to use it, or more appropriately, I started to craft the YAML for K8S objects as part of the OpenShift demos I was giving. And then, when CoreOS produced the brilliant Operator Framework, which I will also have a stab at explaining in this post, it suddenly became clear as to what K8S was doing under the hood and how.

So, let’s start with the basics; K8S/OpenShift are actually three things. You have a control plane, which you as a User talk to via the RESTful APIs provided. You have a brain, which contains the ideal state of everything that K8S maintains (more in a second) and you have Workers, which are nodes where ‘stuff runs’. Your applications run on the Workers; we’ll leave it at that for now and come back to it in a sec.

So, with the brain of K8S; this contains a set of Objects. These Objects are of a set of defined types; every object in the brain has to one of these types. Easy example; you have types of ‘oranges’, ‘lemons’ and ‘limes’. In the brain you have instances of these, But the brain, in this case can only have Oranges, Lemons and Limes.

When you interact with the control plane, you can create, modify or delete these objects. You do not interact with the objects; you ask the control plane to operate on those objects.

And this is where it gets cool; so, for every object that the control plane supports (in our daft example oranges, lemons and limes) there is a Controller – put simply this is a while-true loop that sits in the control plane watching the incoming requests for any mention of the object it owns; in our pithy example the control plane would have an orange controller, a lemon controller and a lime controller.

When the control plane receives a request the appropriate controller grabs it; the controller can create the objects, change the state of the objects and delete the objects within the brain. When an object is created, modified or deleted within the brain the control plane will act to reconcile that state change; physical actions are performed on the Workers to reflect the required state in the brain.

Deep breath. And this is what makes K8S so cool; each and every object type has its own control point, the brain reflects the state as required by the controllers and the combination of the control plane and the Workers realise those changes,

Now, with the Workers there’s a cool little process that sits on every one called, cutely, a Kubelet. This is the action point; it takes demands from the control plane and physically realises them, and reports back to the control plane if the state deviates from the state the brain wants.

This fire-and-forget, eventually-consistent distributed model is a wonderfully architected idea. It takes a while to get your head around it but when it clicks it’s a wonderful ‘oh yeah…..’ moment.

So, talking a little more technically – when you talk to the control plane you send object definitions via a RESTful API. K8S uses the object definitions to decide which controller to inform (not quite the way it works, think of it as a event/topic based model where al the controllers listen on a central bus of messages; the type of message defines which topic the event lands in, the controllers take the events off the topics – interestingly the reconciliation process works identically; responses from the kubelets arrive as events as well; the whole system works around this principle which is why it is so well suited for the distributed model.

And this is where Operators come in; Operators were the last piece in the puzzle to making K8S extensible without breaking it. I’ll give an example of this from personal experience; OpenShift 3 was a really nice enterprise spin of K8S; Red Hat added some additional objects for security, ingress and the like and to do that it had to produce Controllers for those objects and inject them into the core K8S.

This was problematic; K8S, as an Open Source project, churns a lot; innovation is like that, so to produce a stable version of OpenShift a line in the sand had to be drawn; the K8S version would be taken, the new controllers added to the code base, the binaries spun, tested, released. And every time a new version of K8S dropped the whole process would need to be repeated. In essence a Frankenstein K8S would have to be brought to life every time OpenShift wanted to onboard a newer version of K8S.

So CoreOS came up with this incredible idea for allowing Custom Controllers to be written and executed that ran as applications on K8S as opposed to being embedded in the core controllers. In English lets say we add a Pineapple object to our K8S knowledge; in the old days we’d have to add a controller into the control plane, effectively polluting the codebase. Now we run an Operator that sticks up a flag that says ‘anything Pineapples is mine!’.

Now, when the control plane receives any object requests around pineapples they don’t go into the event bus for the K8S controllers but instead are intercepted and processed by the Pineapple Operator; it uses the brain as the controllers do, but only to store state information about Pineapples.

This clever conceit meant that suddenly your K8S implementation could handle any new Objects without having to change the core controller plane.

It gets better – the entirety of OpenShift 4.x is implemented as Operators (that operate at the Cluster level). So all the good stuff OCP adds to K8S is done without impacting or altering the core control plane.

I like it a lot because the mechanisms by which Operators work means I can write Operators, in my favourite language, JAVA, which exist outside of the OpenShift cluster; the Operators announce themselves to the control plane, which registers the match of object types to the Operator, and then sit and listen on the event bus – they don’t run *in* OpenShift at all, which is great for testing without impacting the cluster.

One last thing on Operators – how many times have you had this issue when deploying an application?

Me: The application won’t start when I deploy the image?

Dev: Yeah, you need to set environment variables I_DIDNT_TELL_YOU_ABOUT_THIS and WITHOUT_THIS_THE_APP_BREAKS

That little nugget of configuration information lives in the Devs head; there’s nothing in the image that tells me it needs those (we developers tend to get over-excited and documenting stuff is last on the post-it list of jobs we don’t really want to do).

The beauty of Operators is, when written properly, they can encapsulate and automate all of those ‘external to the app’ configuration components; the job of an Operator, as with any controller in K8S, is to configure, maintain and monitor the deployed objects/applications – now a dev can write a quick Operator that sets up all the config, external linkage and the like that is essential to the application, and the Operator will enforce that.

Day Two ops and all that lovely CICD goodness……

Anyway, thanks for sticking with this stream of consciousness; I needed to do it as part 2 of the Knative blog posts talks about Operators…..

Categories
Uncategorized

Fun with Knative (part 1)

Serverless. A term that used to make me shudder whenever it was mentioned for some unknown reason. The literal part of my brain really doesn’t like to hear ‘serverless’; it sounds like whatever compute you are using is magic. I’ve been told off a couple of times in meetings as referring to it as ‘unicorn’s arse’ in jest; like Cloud is ‘someone else’s machine’ serverless is effectively ‘someone else’s compute’.

Any, I digress, which I do a lot. There’s a Kubernetes project called knative which does some very, very clever stuff around, well, ‘serverless’ for lack of a better term, and as it is now supported in OpenShift I found myself wondering how to demo it in a such a way as to be visual appealing and explanatory of what it was doing.

But what is it?

Glad you asked. So, to put it very simply, knative (serving, I’ll explain the differences later) autoscales your application down to zero copies.

That may not sound exciting; you can scale an app down to zero yourself, but that’s not the point. What it does is actually really cool; OpenShift offlines the container/pod until it is needed – a call into the application forces OpenShift to restore the container and serve the request, then wait for an inactivity timeout and then offline the container.

How is that helpful? Put it like this; say you have ten webservices as part of your application that you provide to the outside world. The nature of running these in a Kubernetes/OpenShift system means you have to have at least ten Pods, where the Pod is the application (and the smallest atomic deployable component), running at all times. Now say that 9 of those 10 applications were called once a day, and the 10th was called once a minute. OpenShift/Kubernetes needs to keep all ten up all the time in case they are called. These Pods are resident, they take up resource, and they are not being exercised (9 of them) for the majority of time they are active.

So, if you offline 9 of them and make them knative applications, OpenShift will remove them from the platform while they are not being used, and restore them when they get traffic. So, for the vast majority of the 24 hours, you have one active Pod and momentarily others for the duration of their call and the timeout period.

Which is WAY more efficient; and that extra space can be used for other applications instead. Everything about Containerisation is about efficiency and this is just the next step.

How does it actually work?

So, a knative service behaves slightly differently to a standard application on OpenShift. A very quick introduction to how applications talk to the outside world – a Kubernetes/OpenShift platform has an internalised network, the SDN (software defined network), on which everything internal lives. Every aspect of OpenShift is a Pod itself and the way I describe it to customers is that everything that lives on the SDN has a doorbell, which is called a ‘Service’.

In actuality this Service is an internal IP address and this is where it gets cool – let’s say you’ve created a little webserver. You deploy that in OpenShift and it gets a Service which maps to, say, port 80 in the container. If you then scaled that up, let’s say because your webserver is getting thrashed and you need some more grunt, OpenShift will create additional replicas, which are Pods themselves. But it still retain a singular Service address – this IP now works as a load balancer over all the IPs of the replicas – the Service is a single consistent endpoint regardless of the number of copies of the application you are running.

But from an external perspective these Services/IP addresses are invisible. OpenShift provides a mechanism called ‘Routes’ which provides an externally consumable FQDN (fully qualified domain name) by which an external process can send traffic to the Service. These routes map to the singular Service points within the system; when traffic arrives at the OpenShift cluster via the Route it is forwarded on to the Service, and then to the Pod itself, load-balanced appropriately depending on the number of replicas.

Pictured – for info I have highlighted the Services bit; note the Service (internal endpoint) and Route (external endpoint)

That’s all cool, but forget about it for now as part of knative services…..

Ingress works slightly differently for the knative Services for a good reason – if you scale the application down to zero replicas in a normal situation and call the Route/Service you will get an error; the traffic immediately flows to the Service which of course isn’t there (if you’ve used OpenShift this is the pretty formatted ‘Application is Unavailable’ page, which comes from the HAProxy load balancers).

This is not the behaviour we want, so for knative Services OpenShift has a different type of ingress receiver, one that triggers the reloading of the application if it is not there, or ingresses the traffic if it is.

This caught me out when building the demo that I’ll talk about later; I was getting FQDN endpoints being generated but, interestingly, no routes in the namespace.

So, to quickly summarise, when you create a knative service OpenShift sets up this endpoint (called a ksvc, or, tadah, a knative Service). When an external consumer sends a request to the FQDN provided as the ksvc endpoint the system will either reload the app, if it is not present, or pass the traffic into it, if it is. The endpoint has a timeout such that when no requests are received within a given period the application is offlined (the application is scaled t 0 replicas).

So, I’ll keep these blog posts as short as I can as I have a tendency to get excited – in part 2 I’ll describe the goals behind the demo (which is available if you can’t wait at https://github.com/utherp0/knativechain) and how to easily setup the knative serving stuff on OpenShift.

Before I stop, a quick mention of knative serving and knative eventing – OpenShift provides two ways to set knative Services up – one is driven by user requests through an FQDN (serving, what I’ve been whittering on about) and the other which is tying the behaviour to a queue of messages instead (eventing). You’ll see both when you install the Operator; I’m sticking with Serving for this demo as it’s easier to configure.