For the last couple of weeks I’ve been experimenting with a customer using Spark on OpenShift and it’s a lot of fun. For those who have never heard of Apache Spark it’s a ‘unified analytics engine for large-scale data processing’. A next-generation Hadoop, so to speak.
I’d never really looked at Spark as I thought it was a: complicated and b: complicated. I never really got what Spark was all about. But working with this customer it started to become clear; the advantages of distributed and parallelised algorithms is massive for certain ‘massive data’ workloads.
So I taught myself how to use Spark, and more importantly, how to use it with Kubernetes/OpenShift. And to my surprise it was pretty simple once you got the basics.
This blog post will walk through the manual approach to using Spark on Kubernetes/OpenShift, using the Spark command-lines to push jobs and configuration to an OpenShift cluster, and then explain how to use the Google Spark Operator, which runs on OpenShift and provides a YAML based way to do the same thing as the command line. I’ll also show an example where I execute a Spark job across some shared storage; the key components of being able to execute a job, being able to execute a job using a YAML based approach and being able to attach storage for persistence away from the job lifespan gives you all the key pieces you need to start having fun with Spark.
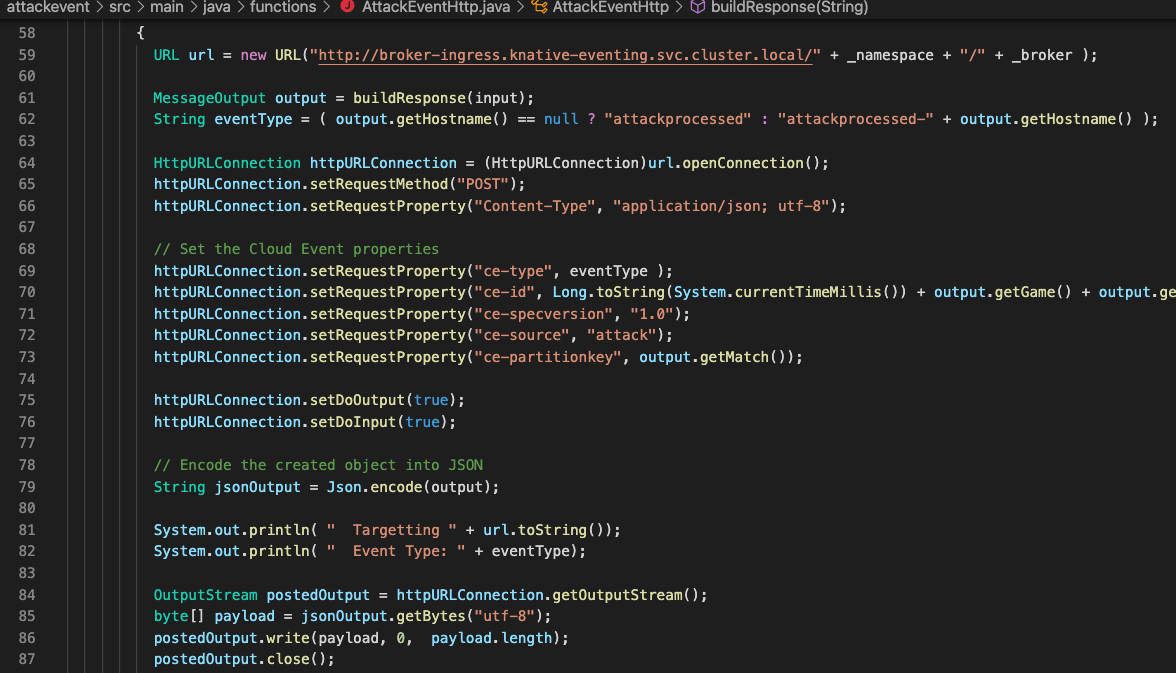
I’ve chosen JAVA as my weapon of choice for the examples – the Spark images I have used come with some fantastic little examples and I’ve cribbed from them. You can also write your applications in Python, R or Scala; in fact when I demo Open Data Hub (the ML toolkit for OpenShift) I run a Python based Spark workload for calculating Pi (the classic example that is used), with ODH orchestrating the Spark Cluster under the covers.
I also wanted to be able to use my own code for the examples, just to demonstrate to the customer how to distribute their apps accordingly. So the first thing I did was to create a composite Docker Image containing the Spark runtime and framework plus my Application.
All of the example code is available at https://github.com/utherp0/sparkdemo
I used the Spark images provided by datamechanics from Docker Hub at https://hub.docker.com/r/datamechanics/spark
The Dockerfile to create my composite Spark image was very simple and consisted simply of:
FROM datamechanics/spark:jvm-only-3.0.0-hadoop-3.2.0-java-11-scala-2.12-latest
COPY target/sparktests-1.0.jar /opt/
I ran this is the root of my repo; having built the application using Maven the jar file was in the target/ directory – the Dockerfile simply added the application into the /opt/ directory of the composite image. I then pushed that to my quay.io account.
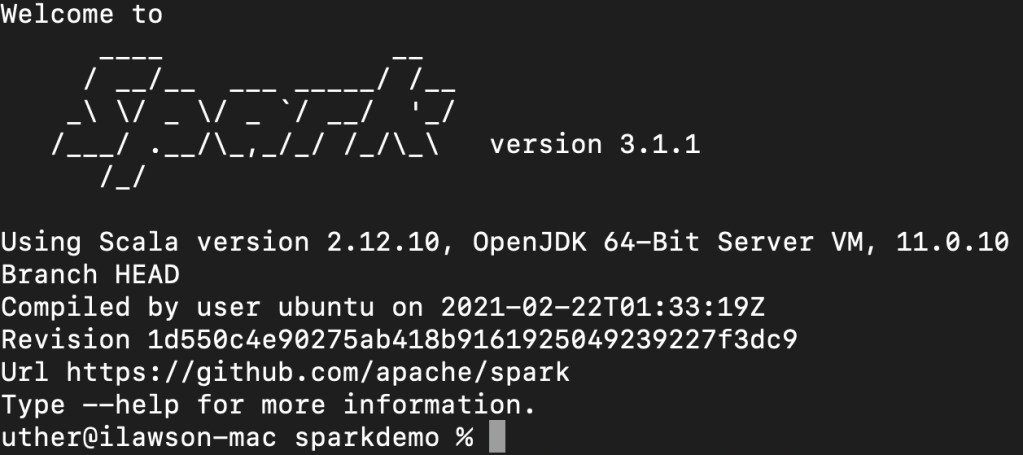
I then installed the Spark framework on my Mac (simply using the brew command).
I logged onto my OpenShift cluster and created a project called sparkexample. Then, to run the Spark workload, it was as simple as issuing the following command:
spark-submit --master k8s://https://api.cluster-d2ed.d2ed.sandbox1722.opentlc.com:6443 --deploy-mode cluster --name spark-pi-uth --class org.uth.sparkdemo.PiSparkTest1 --conf spark.executor.instances=2 --conf spark.kubernetes.namespace=sparkexample --conf spark.kubernetes.container.image=quay.io/ilawson/sparktest1:latest local:///opt/sparktests-1.0.jarI’ve bolded the components of interest – the master is where the Spark job will be scheduled; in this case I’m targeting Kubernetes (k8s://) and providing the API address for my OpenShift cluster.
The name is the name that will be applied to all the objects created within the namespace.
The class is the actual workload I built in my JAR file.
The executor instances is how many ‘workers’ I want to create to execute the job – Spark works by creating a ‘driver’ which then orchestrates and controls/aggregates the ‘executors’. This is all done for you by the Spark interaction with the Cluster API. In this case I have indicated I need two executors.
I then target the namespace I created using a conf entry for spark.kubernetes.namespace.
I then provide the composite image location (which is my prebuilt image with the Spark framework and my JAR file in it).
I then provide the location of the workload as the last parameter; in this case it is a local file within the image (local:///opt/sparktests-1.0.jar) which I created using the Dockerfile.
The fun thing is that this doesn’t work, because of OpenShift’s clever security model that stops naughtiness. What happens is the driver is created, but then doesn’t have the access, through the serviceaccount you get by default in OpenShift, to do the things the driver needs to do (create a Pod, create a configmap, create a service).
The easy (but not the right way) to fix this is to simply give the default service account admin rights to the namespace. The correct way, which is much better, is to create a serviceaccount in the project specifically for Spark jobs. So I did that.
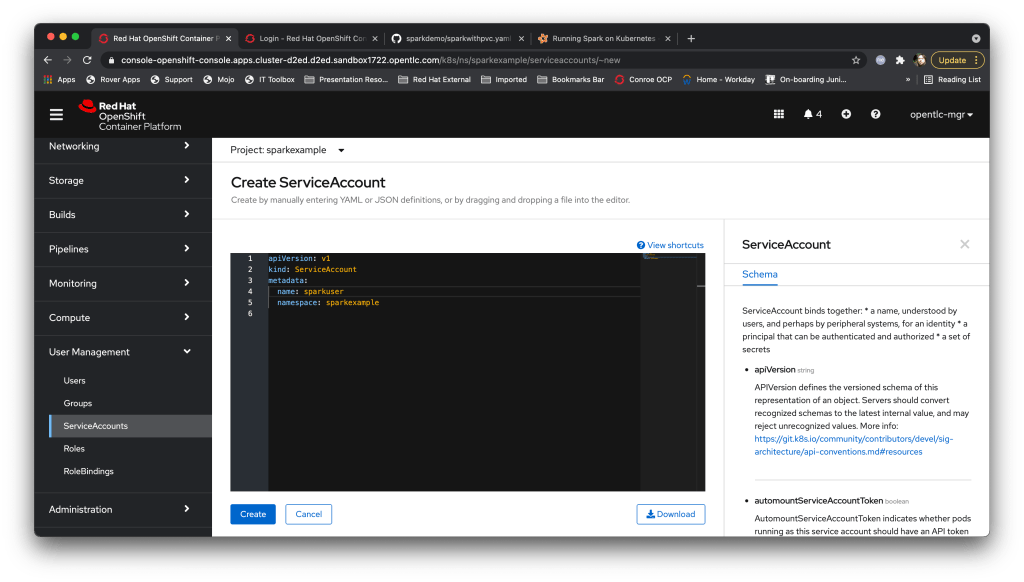
I then created a ‘Role’ which had only the operations the Spark driver needs thus:

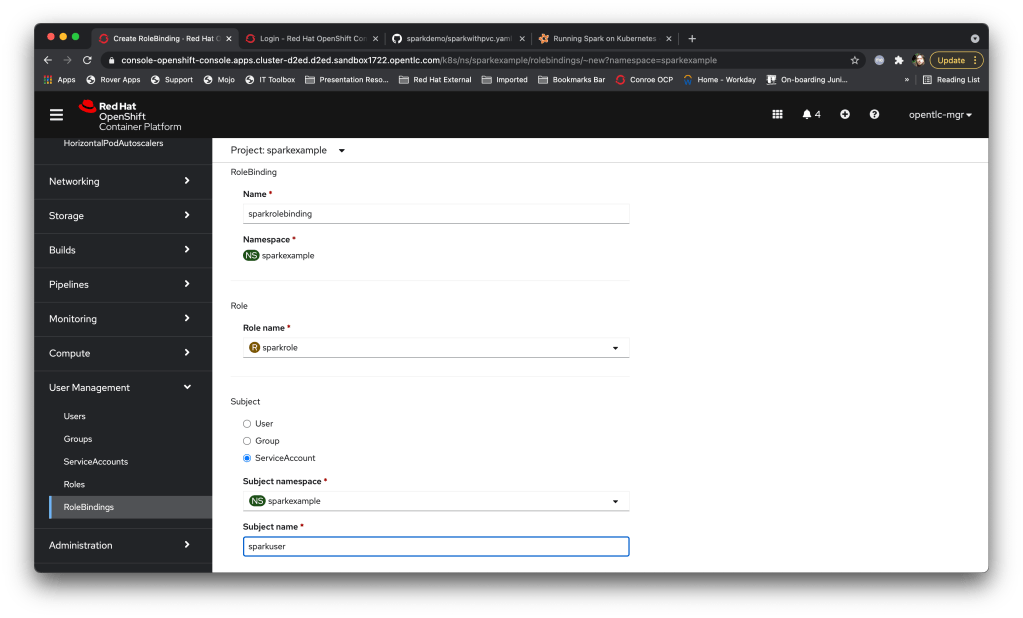
And finally a ‘RoleBinding’ to assign that Spark role needed to my new Service Account:
Now I just have to add:
spark-submit --master k8s://https://api.cluster-d2ed.d2ed.sandbox1722.opentlc.com:6443 --deploy-mode cluster --name spark-pi-uth --class org.uth.sparkdemo.PiSparkTest1 --conf spark.executor.instances=2 --conf spark.kubernetes.namespace=sparkexample --conf spark.kubernetes.authenticate.driver.serviceAccountName=sparkuser --conf spark.kubernetes.container.image=quay.io/ilawson/sparktest1:latest local:///opt/sparktests-1.0.jarTo my spark-submit. I then watched the Pods within my namespace (the Error one was the attempt we tried without the serviceaccount). The driver started, created the executor Pods, executed the workload in those Pods, terminated those Pods and aggregated the results. Et voila….
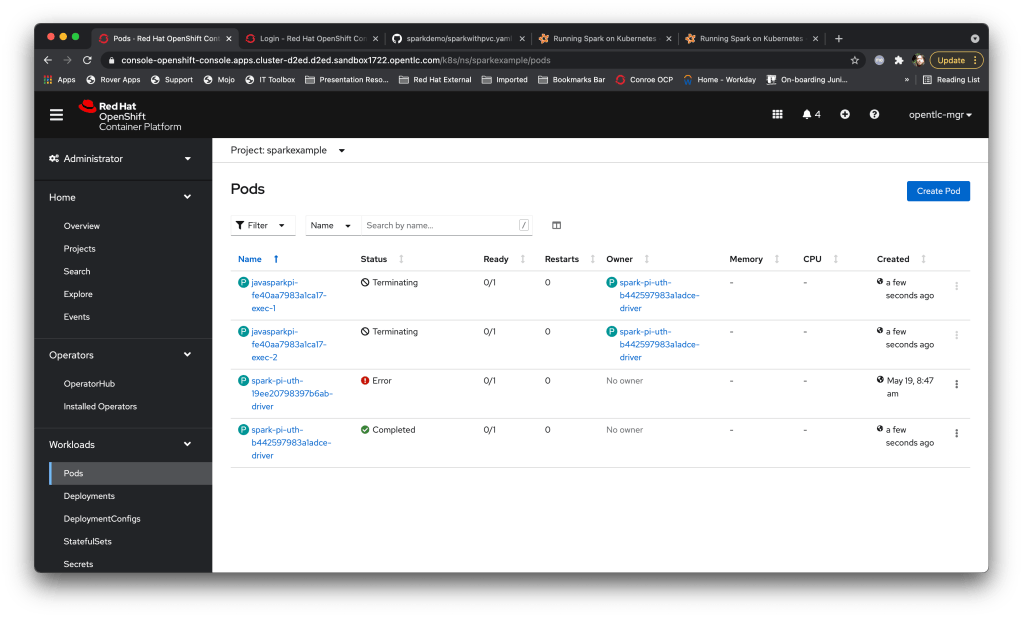

What’s nice is that using the serviceaccount allows the Cluster ops to control exactly what the Spark jobs can do; this is part of the OpenShift system and provides a superb security model.
You can also use the spark-submit approach to run workloads that have shared storage as well – the spark-submit command provides configuration options for attaching PVCs to both the driver and executor Pods; the only gotcha is that to orchestrate jobs using a piece of shared storage you must express the PVC to both the driver and the executors thus:
  --conf spark.kubernetes.driver.volumes.persistentVolumeClaim.rwxpvc.options.claimName=(claimname) \
  --conf spark.kubernetes.driver.volumes.persistentVolumeClaim.rwxpvc.mount.path=(mount dir for driver) \
  --conf spark.kubernetes.executor.volumes.persistentVolumeClaim.rwxpvc.options.claimName=(claimname) \
  --conf spark.kubernetes.executor.volumes.persistentVolumeClaim.rwxpvc.mount.path=(mount dir for driver) \
Interestingly this also works with PVCs that are created as ReadWriteOnce, even though the conf specifies rwxpvc….
There’s a nice little example provided with the Spark framework image that does a distributed wordcount (total of individual words) – as a test I ran a spark-submit for that job, having created a quick PV in OpenShift, mounted it to a Pod, created a file (/mnt/playground/words.txt) and then provided that PVC as conf parameters into the spark-submit.
The command looks like:
spark-submit --master k8s://https://api.cluster-d2ed.d2ed.sandbox1722.opentlc.com:6443 --deploy-mode cluster --name spark-pi-uth-wordcount --class org.apache.spark.examples.JavaWordCount --conf spark.executor.instances=2 --conf spark.kubernetes.namespace=sparkexample --conf spark.kubernetes.authenticate.driver.serviceAccountName=sparkuser --conf spark.kubernetes.container.image=datamechanics/spark:3.1.1-latest --conf spark.kubernetes.driver.volumes.persistentVolumeClaim.rwxpvc.options.claimName=wordclaim --conf spark.kubernetes.driver.volumes.persistentVolumeClaim.rwxpvc.mount.path=/mnt/playground --conf spark.kubernetes.executor.volumes.persistentVolumeClaim.rwxpvc.options.claimName=wordclaim --conf spark.kubernetes.executor.volumes.persistentVolumeClaim.rwxpvc.mount.path=/mnt/playground local:///opt/spark/examples/jars/spark-examples_2.12-3.1.1.jar /mnt/playground/words.txtAnd when the driver completes the output looks like:

Which works a treat – that example effectively mapped persistent storage into the driver and all of the executors.
Whilst that is nice (I think so) the commands are starting to get a little unwieldy, and if you add in the configuration you have to do (setting up the roles/role-bindings and the like per namespace) it feels a little clunky.
To make it much easier to use there’s an Operator (as there always is, nowadays) that wraps it all up nicely for you. Currently there are two you can choose from on the Red Hat Operator Hub, but going forward Red Hat will be contributing to the Google Spark Operator.
I installed the Google Spark operator into another namespace using the OpenShift operator hub – one of the nice features is that the Operator also installs a serviceaccount (“spark”) which is pre-configured with the appropriate roles for running spark workload kubernetes components, negating the need to create a role yourself.
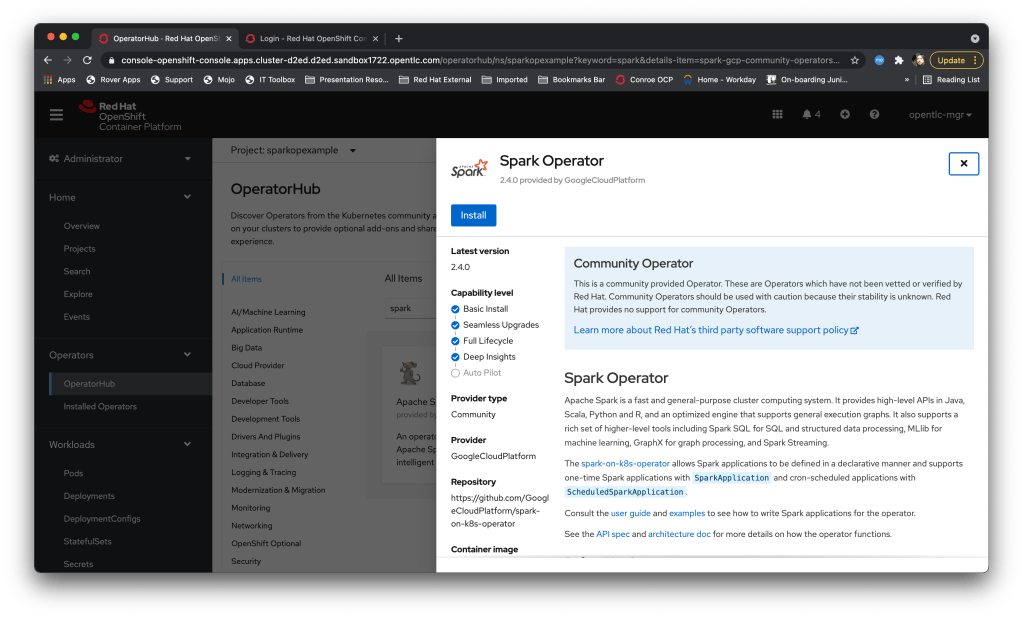
You will also note that unlike a lot of ‘community’ Operators the Spark Operator capability level is nicely almost complete. It’s a mature Operator, which is why Red Hat are contributing to it rather than re-inventing the wheel.
And this is where it gets fun – instead of constructing a verbose ‘spark-submit’ command you simply create an appropriately formatted piece of YAML and submit it in the namespace where the Operator is installed. For instance, the first example we did earlier (my version of the PiSpark example using a composite image) now looks like:
apiVersion: sparkoperator.k8s.io/v1beta1
kind: SparkApplication
metadata:
  name: uthsparkpi
spec:
  sparkVersion: 3.1.1
  type: Java
  mode: cluster
  image: quay.io/ilawson/sparktest1:latest
  mainClass: org.uth.sparkdemo.PiSparkTest1
  mainApplicationFile: local:///opt/sparktests-1.0.jar
  sparkConf:
    "spark.kubernetes.authenticate.driver.serviceAccountName": "spark"
driver:
  serviceAccount: 'spark'
  labels:
    type: spark-application
  cores: 1
  coreLimit: 1
executor:
  instances: 2
  cores: 1
  coreLimit: 1
What’s also nice is you can push direct spark-submit conf settings via the YAML as well. I can then execute the job in the namespace using the oc command by simply ‘oc create -f’-ing the file.
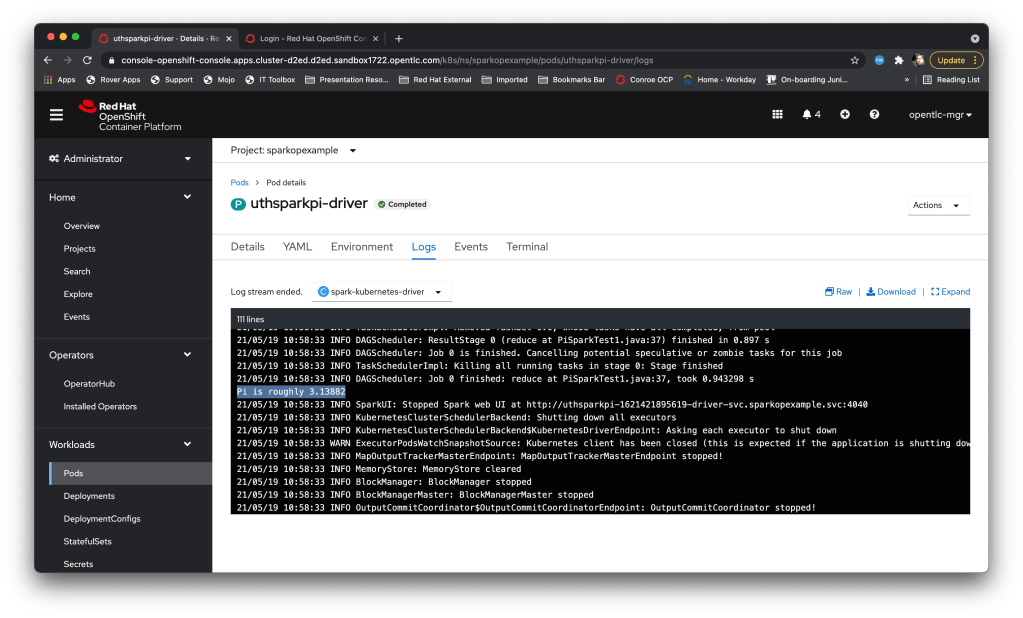
Here’s a screengrab of the job in action – the operator runs as a Pod in the namespace, it receives the custom-resource for a ‘SparkApplication’ and creates the driver Pod, which then creates the Executors it needs and runs the workload.

Once the job has finished the driver pod completes and I can view the logs of the driver pod to get the aggregated response:
In order to execute the workload that requires persistent volumes (and you can add as many volumes as you like through the same methodology) I have the following SparkApplication defined as YAML:
apiVersion: sparkoperator.k8s.io/v1beta1
kind: SparkApplication
metadata:
  name: uthwithpvc
spec:
  sparkVersion: 3.1.1
  type: Java
  mode: cluster
  image: datamechanics/spark:3.1.1-latest
  mainClass: org.apache.spark.examples.JavaWordCount
  mainApplicationFile: local:///opt/spark/examples/jars/spark-examples_2.12-3.1.1.jar
  sparkConf:
    "spark.kubernetes.driver.volumes.persistentVolumeClaim.rwxpvc.options.claimName": "playground"
    "spark.kubernetes.driver.volumes.persistentVolumeClaim.rwxpvc.mount.path": "/mnt/playground"
    "spark.kubernetes.executor.volumes.persistentVolumeClaim.rwxpvc.options.claimName": "playground"
    "spark.kubernetes.executor.volumes.persistentVolumeClaim.rwxpvc.mount.path": "/mnt/playground"
  arguments:
    - /mnt/playground/data/words.txt
driver:
  serviceAccount: 'spark'
  labels:
    type: spark-application
  cores: 1
  coreLimit: 1
executor:
  instances: 2
  cores: 1
  coreLimit: 1
Notice this time rather than set the serviceaccount as a ‘conf’ entry I have used the fully qualified YAML fields (the driver: serviceAccount:).
So that was a very brief introduction but I hope there’s enough core components there to allow you to get playing – once I understood the mechanics of the Spark orchestration it all clicking in place and was a lot of fun to play with…..