Serverless. A term that used to make me shudder whenever it was mentioned for some unknown reason. The literal part of my brain really doesn’t like to hear ‘serverless’; it sounds like whatever compute you are using is magic. I’ve been told off a couple of times in meetings as referring to it as ‘unicorn’s arse’ in jest; like Cloud is ‘someone else’s machine’ serverless is effectively ‘someone else’s compute’.
Any, I digress, which I do a lot. There’s a Kubernetes project called knative which does some very, very clever stuff around, well, ‘serverless’ for lack of a better term, and as it is now supported in OpenShift I found myself wondering how to demo it in a such a way as to be visual appealing and explanatory of what it was doing.
But what is it?
Glad you asked. So, to put it very simply, knative (serving, I’ll explain the differences later) autoscales your application down to zero copies.
That may not sound exciting; you can scale an app down to zero yourself, but that’s not the point. What it does is actually really cool; OpenShift offlines the container/pod until it is needed – a call into the application forces OpenShift to restore the container and serve the request, then wait for an inactivity timeout and then offline the container.
How is that helpful? Put it like this; say you have ten webservices as part of your application that you provide to the outside world. The nature of running these in a Kubernetes/OpenShift system means you have to have at least ten Pods, where the Pod is the application (and the smallest atomic deployable component), running at all times. Now say that 9 of those 10 applications were called once a day, and the 10th was called once a minute. OpenShift/Kubernetes needs to keep all ten up all the time in case they are called. These Pods are resident, they take up resource, and they are not being exercised (9 of them) for the majority of time they are active.
So, if you offline 9 of them and make them knative applications, OpenShift will remove them from the platform while they are not being used, and restore them when they get traffic. So, for the vast majority of the 24 hours, you have one active Pod and momentarily others for the duration of their call and the timeout period.
Which is WAY more efficient; and that extra space can be used for other applications instead. Everything about Containerisation is about efficiency and this is just the next step.
How does it actually work?
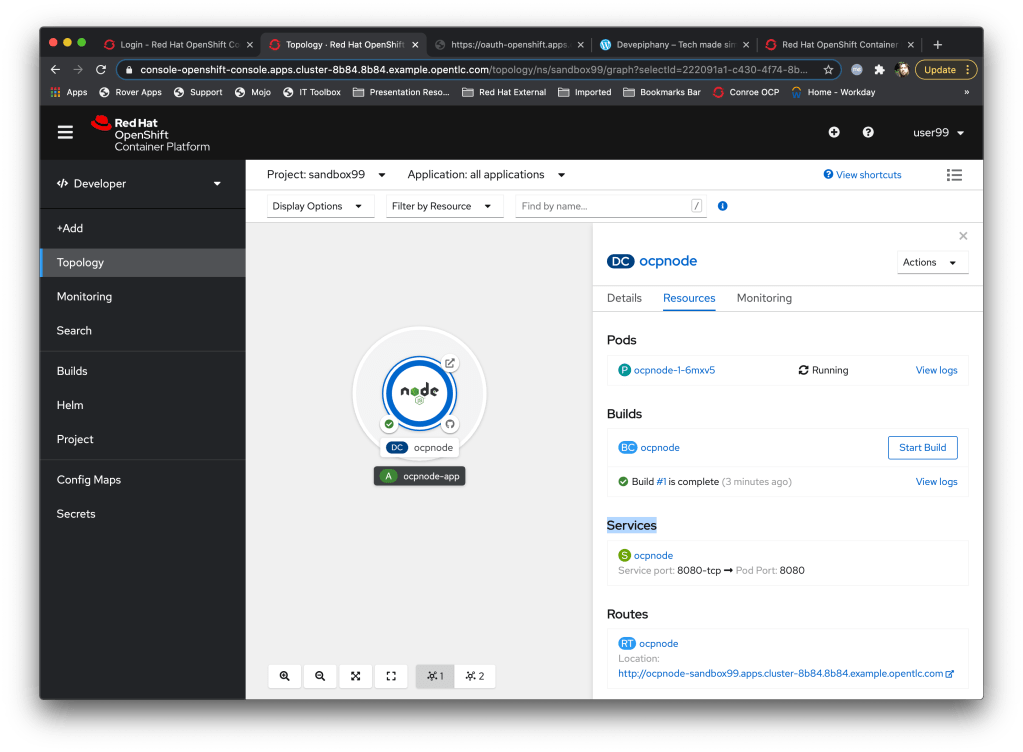
So, a knative service behaves slightly differently to a standard application on OpenShift. A very quick introduction to how applications talk to the outside world – a Kubernetes/OpenShift platform has an internalised network, the SDN (software defined network), on which everything internal lives. Every aspect of OpenShift is a Pod itself and the way I describe it to customers is that everything that lives on the SDN has a doorbell, which is called a ‘Service’.
In actuality this Service is an internal IP address and this is where it gets cool – let’s say you’ve created a little webserver. You deploy that in OpenShift and it gets a Service which maps to, say, port 80 in the container. If you then scaled that up, let’s say because your webserver is getting thrashed and you need some more grunt, OpenShift will create additional replicas, which are Pods themselves. But it still retain a singular Service address – this IP now works as a load balancer over all the IPs of the replicas – the Service is a single consistent endpoint regardless of the number of copies of the application you are running.
But from an external perspective these Services/IP addresses are invisible. OpenShift provides a mechanism called ‘Routes’ which provides an externally consumable FQDN (fully qualified domain name) by which an external process can send traffic to the Service. These routes map to the singular Service points within the system; when traffic arrives at the OpenShift cluster via the Route it is forwarded on to the Service, and then to the Pod itself, load-balanced appropriately depending on the number of replicas.
That’s all cool, but forget about it for now as part of knative services…..
Ingress works slightly differently for the knative Services for a good reason – if you scale the application down to zero replicas in a normal situation and call the Route/Service you will get an error; the traffic immediately flows to the Service which of course isn’t there (if you’ve used OpenShift this is the pretty formatted ‘Application is Unavailable’ page, which comes from the HAProxy load balancers).
This is not the behaviour we want, so for knative Services OpenShift has a different type of ingress receiver, one that triggers the reloading of the application if it is not there, or ingresses the traffic if it is.
This caught me out when building the demo that I’ll talk about later; I was getting FQDN endpoints being generated but, interestingly, no routes in the namespace.
So, to quickly summarise, when you create a knative service OpenShift sets up this endpoint (called a ksvc, or, tadah, a knative Service). When an external consumer sends a request to the FQDN provided as the ksvc endpoint the system will either reload the app, if it is not present, or pass the traffic into it, if it is. The endpoint has a timeout such that when no requests are received within a given period the application is offlined (the application is scaled t 0 replicas).
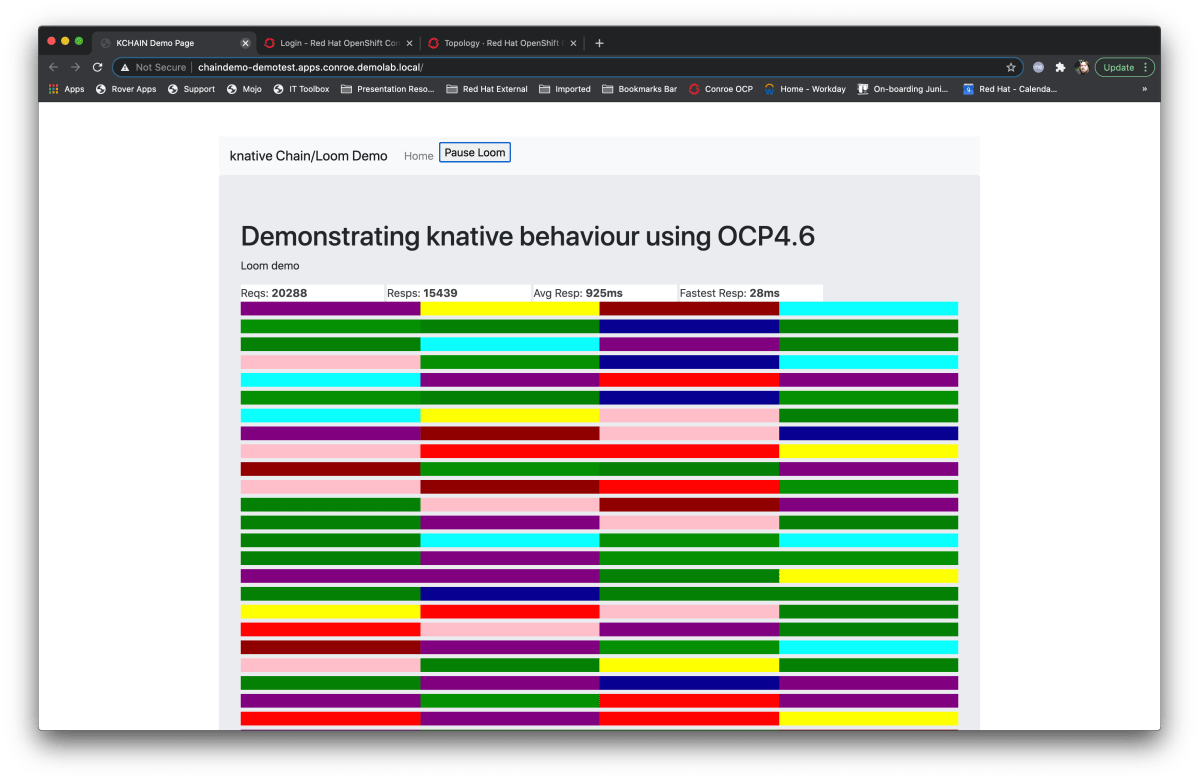
So, I’ll keep these blog posts as short as I can as I have a tendency to get excited – in part 2 I’ll describe the goals behind the demo (which is available if you can’t wait at https://github.com/utherp0/knativechain) and how to easily setup the knative serving stuff on OpenShift.
Before I stop, a quick mention of knative serving and knative eventing – OpenShift provides two ways to set knative Services up – one is driven by user requests through an FQDN (serving, what I’ve been whittering on about) and the other which is tying the behaviour to a queue of messages instead (eventing). You’ll see both when you install the Operator; I’m sticking with Serving for this demo as it’s easier to configure.
